
So time and time again, I get asked,”how hard is it to make black tea at home?” A few years ago, I would of responded,”it is not easy.” George Mitchell, former USDA tea scientist, wrote a publication about it in 1907 titled,”Homegrown Tea.” ( USDA 1907 FarmerBulletin 301 Homegrown Tea )
Now granted this was roughly 2 years after the first commercial enterprise to spinoff of the USDA tea experimental garden “Pinehurst,” known as American Tea Growers operated by Mr. Tyler and Mr. Trimble had failed. Shepard’s success in his “Pinehurst” operation gave credence that even if a commercial industry could not take form, at least the USDA could tackle one of the major problems with tea cultivation as noted by William Saunders. People could easily grow Camellia sinensis in the southeast and out west, but they lacked the technical skills in processing the raw leaf into finished tea, henceforth came Mr Mitchell’s publication.
Tea making can also be sensory dependent. Sure you can describe the smell, the feel, and visual observation, but for most people this requires actual physical observation to create the right imprint in their brain. Plus, if you mess up one part of the processing part, there is no fixing or recovery, the finished product is always going to be anything from inferior to unpalatable. Hence why it is important to drink the tea after it is made, even if you know you have messed up, so you understand that sensory aspect as well.
While artisan skills of making excellent tea is thousands of years old, in the last century science has given explanations as into how each part of the process is crucial for the next. After several years of collecting academic papers concerning such scientific explanations and coupled with previous professional experience, I wanted to develop a simplified way for individuals at home to make black tea. So instead of drowning everyone in minute details and explain long scientific terms and processes, I boiled it down to a simplified method based on repeated experiments that yield very good fresh quality tea.
You might be wondering what is the catch, why would you just publish this information? Why are you not trying to capitalize on it? The answer is simple, I want more people to enjoy tea, but most importantly I want them to enjoy tea that they cultivate and can enjoy. The United States is experiencing a tea renaissance period, we had the revolution in the late 1700’s and early 1800’s. Within this renaissance there are a bunch of people who are risking a lot to have successful commercial businesses, yet no one has addressed individuals or even potentially community gardens of tea. Do keep in mind this, you won’t be able to use this method and start a commercial business, it just isn’t feasible economically. I promise though you will be able make very good to good fresh tea for yourself and maybe some to share with friends. Plus since Kombucha is enjoyed and made at home, why not support those drinkers as well. I have family and friends who drink lots of kombucha but will not brew a cup of tea or coffee.
If you are worried about the cultivation of the plants, don’t be, we will address the most important part of it at the end. For right now we are going to focus solely on the processing method.
So we have to begin with the harvest. Harvesting is the first step in the processing method. Again we are not going to get too far down in the weeds of details or climb into any rabbit holes of tea philosophy, we are keeping it simple.
You have to understand that processing tea is essentially controlling moisture loss from the leaves and various chemical reactions. So ideally, you want to start with leaves full of moisture. If your plants can be irrigated, the it is recommended that they be irrigated to 1/2 inch to 3/4 inches of water 48 hours before harvesting. It gives 24 hours to let water drain off and another 24 hours for water to be absorbed through out the plant. If your plants are rain fed, then at a minimum 1/4 inch of rain and you can harvest around 36 hours, again 1/2 inch rain fall would be nice, but Mother Nature is not always nice or cares for what we desire. You don’t want to harvest in a drought as the tea will taste weird and potentially come out unpalatable. You don’t want to harvest when the soils are waterlogged either as this furthers compaction of the soils causing problems.
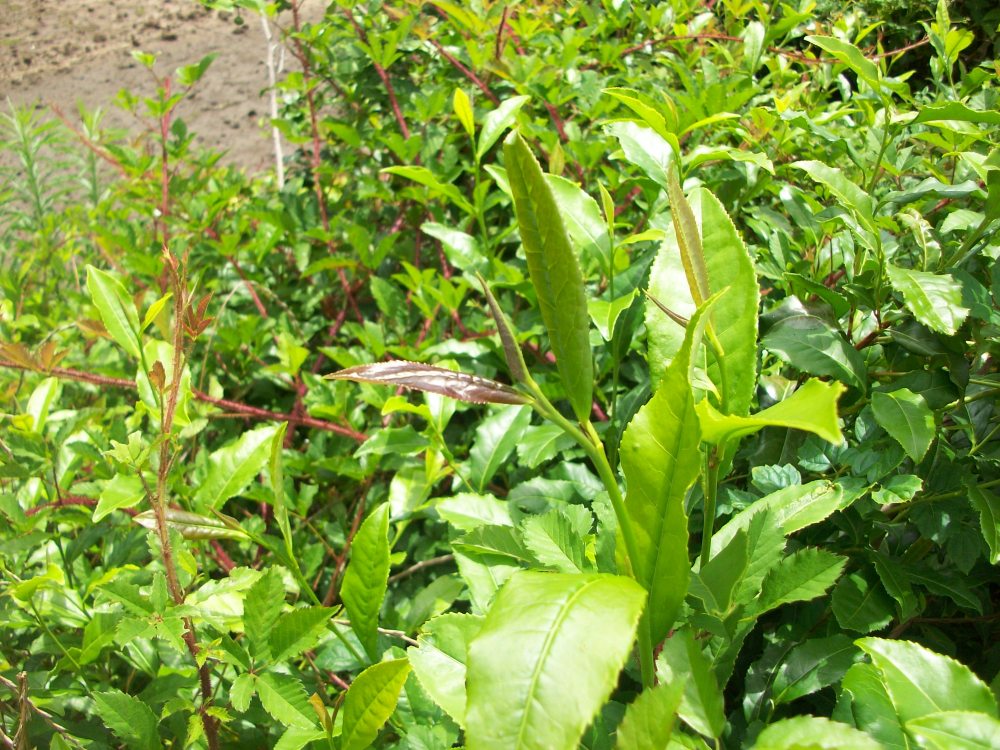
When you go to harvest, you roughly want enough new fresh growth is 4 to 5 nodes of growth. A “node” is where a leaf joins the stem and there is a vegetative buds formed and dormant. You are going to be removing the “bud” which is the very top growth and the two leaves below it. This is called traditionally a “Pekoe cut” or simply “Pekoe.” Ideally there should be at least 2 nodes of new growth below the section that is removed, because that is where your new growth will come from, so for every one growth point removed there is two growth points to potentially fill the space. The more harvest-able growth points, the higher the yield of raw material, which means more finished tea and well maintained bushes.
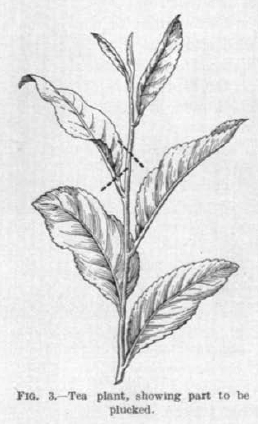
In the picture above, you would pinch off the pekoe halfway in between the first green leaf and the next green leaf, remember the first reddish leaf is the bud and the second reddish leaf is the first leaf with the first green leaf being the second leaf of the pekoe. Just a simple pinch of the stem with your thumb and index finger and then slight tearing upward motion as you would bringing your index finger to your chest. If you want to wear some type of glove and use a knife, you can, or if you rather use your pruners or kitchen shears, go right ahead. Whatever makes you comfortable and efficient. The picture below is another graphic in finer detail of harvesting the pekoe.
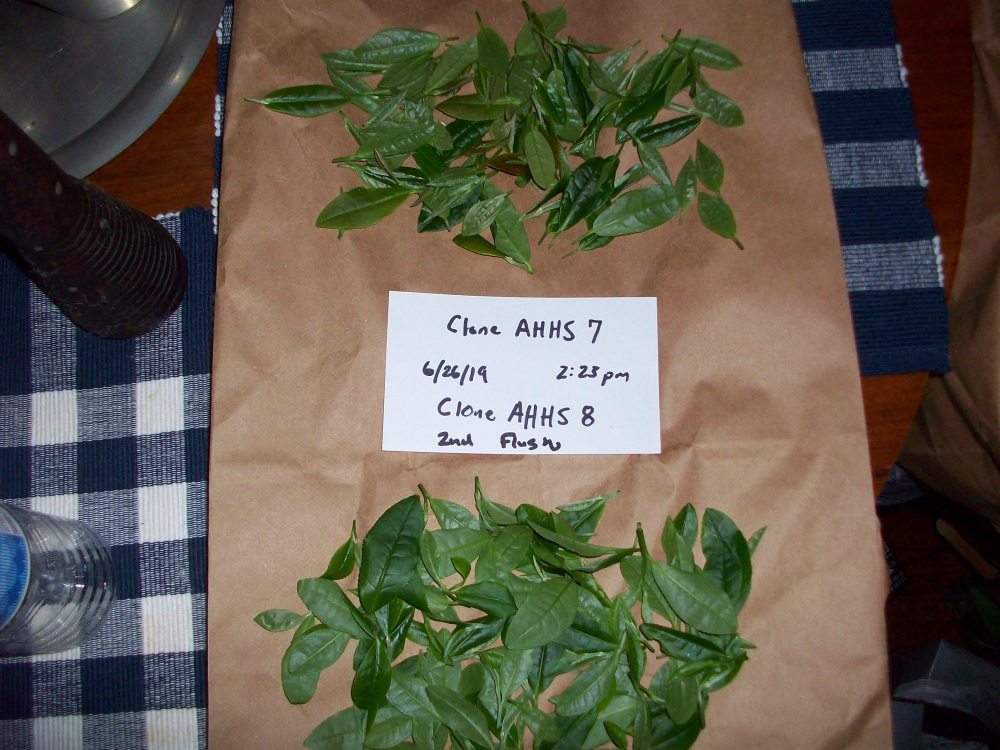
I have found that a large “lawn and leaf” paperbag works great to collect the buds when harvesting. It provides a barrier between the raw material and the ground, it can be self standing between the bush and yourself, blocks sun light and insulates the leaf material from heating up, and it is easy to drop the buds in the bag. Plus from a volumetric point of view, you can put a lot of leaf into one bag. I typically empty the leaf out every 30 minutes and bring it inside, so the leaf doesn’t heat up in the bag.
Now when is the right time of day to harvest? Well science has shown that once harvested and you begin the withering process, typically 15 to 17 hours after withering starts is when the highest build up of poly phenol oxidase (PPO). PPO is important component in chemical reactions that create the flavor during oxidation. So realistically, the question becomes when do I want to stop withering and start rolling? So if a person who wants to start rolling at 9am the following morning, then they should harvest their tea the afternoon before at 4pm till 6pm.
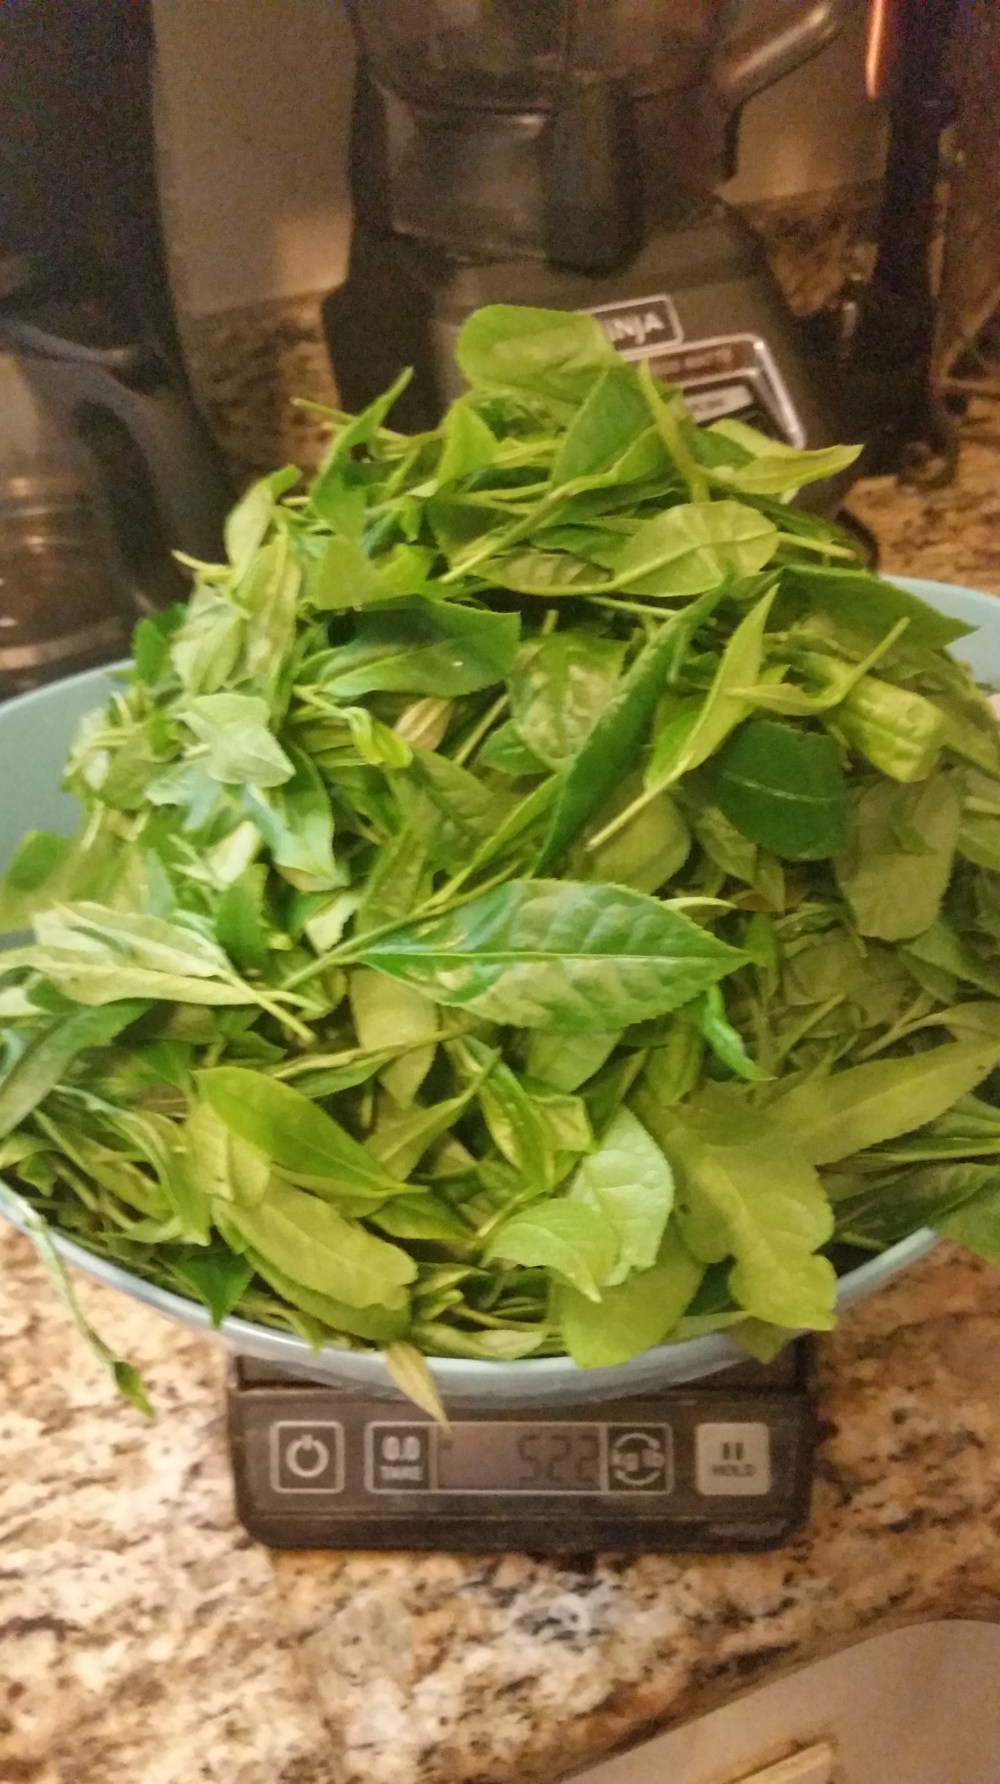
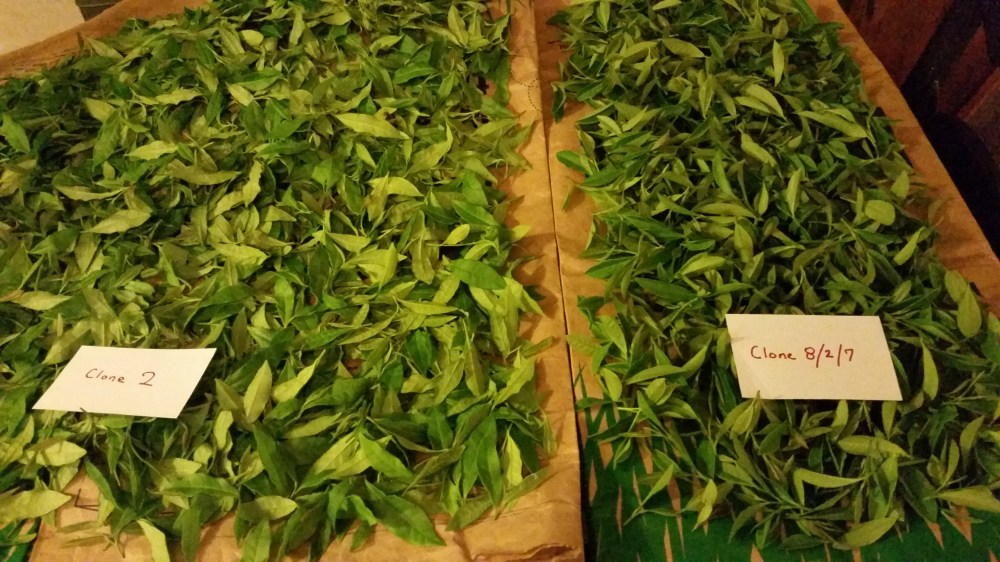
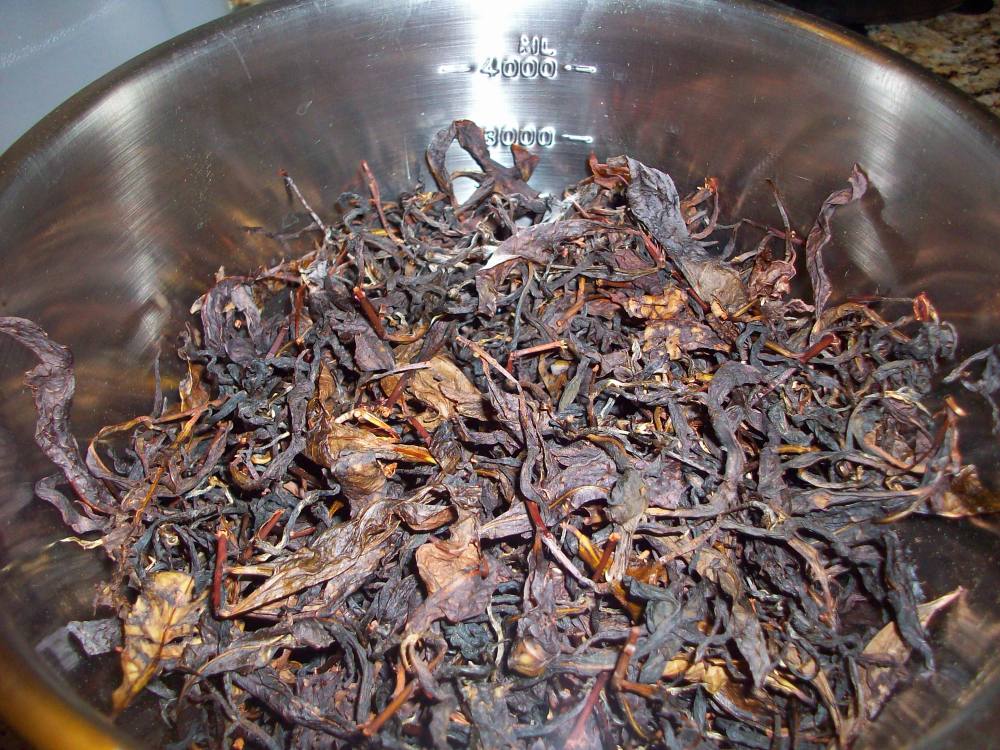
Once you harvest the tea and bring it inside, you move onto the next step a fairly simple and easy one, withering. First you want to weigh and record the total mass of leaf harvested. After you have recorded your mass, take those same paper bags and lay them down on a table in your climate controlled house. Slowly spread the leaves on the bags so that they are evenly distributed and form no more than an inch layer. If it is more than an inch, it is fine, just not more than inch and half. Occasionally move the leaves around even so often, turning them so that moisture loss is even, you should do it at least once, I do it before I go to bed and I would do it again if I wake up early with a few hours left before rolling.
Once the withering process is complete, you want to move onto the next phase, rolling. Now there is a popular way of using cheese cloth for this phase, but I prefer to do it by hand. The reason why is because when I do it by hand, I can stop the rolling when I feel it is right. I am not saying you cannot with the cheese cloth, but I think you have better control doing smaller batches of leaf. So, I suggest learning to it do it by hand first and at a later time if you want to move onto cheese cloth, then do so. The importance of rolling, is to crush the cells and let the juices from within the leaf come to the surface. In India, while the leaf is handpicked, typically large estates use machines to roll with varying pressures in stages.
You will need a few items to conduct this step. First item you will need is some latex gloves, culinary type that are disposable. Second you will need a baking sheet and line it with aluminum foil. The third item is optional, but I like to use it, a bowl that you transfer and hold the raw leaf in from the withering pile. You could also just simply do the rolling next to withering pile, but for those who want to be comfortable in their favorite chair, the bowl helps.
Start off by grabbing two handfuls of raw leaf and cupping and pressing into a ball. Then slowly start to work that ball by moving your hands in a circular motion adding pressure as you go along. Once you have formed a ball, hold the ball in between your hands and move your hands back and forward in opposing motion, so that you flatten the ball in to a cigar shaped cylinder. Once you have formed the cylinder, turn it 90 degrees and repeat the process so you have equally applied pressure in an opposite direction. Next take the cylinder and with your thumb and the top of the index finger break up the cylinder. I call this,”heading shrimp,” or “talking money,” because the finger motion is similar if not identical to it. Push up with your thumb while pulling your index finger down your thumb. (Show me the money) The final form to roll is a little more difficult, but it helps create a finer roll, it is called,”push and pull.” So with your left hand with palm cupped and facing up, place the tea in it. With your right hand cover it up. Now with the left hand pull it towards your body and push your right hand away from your body. Once you have gotten to edge of your hand with the motion turn your over at the wrist and repeat yet this time you pull with the right and push with the left, repeating the action over and over.
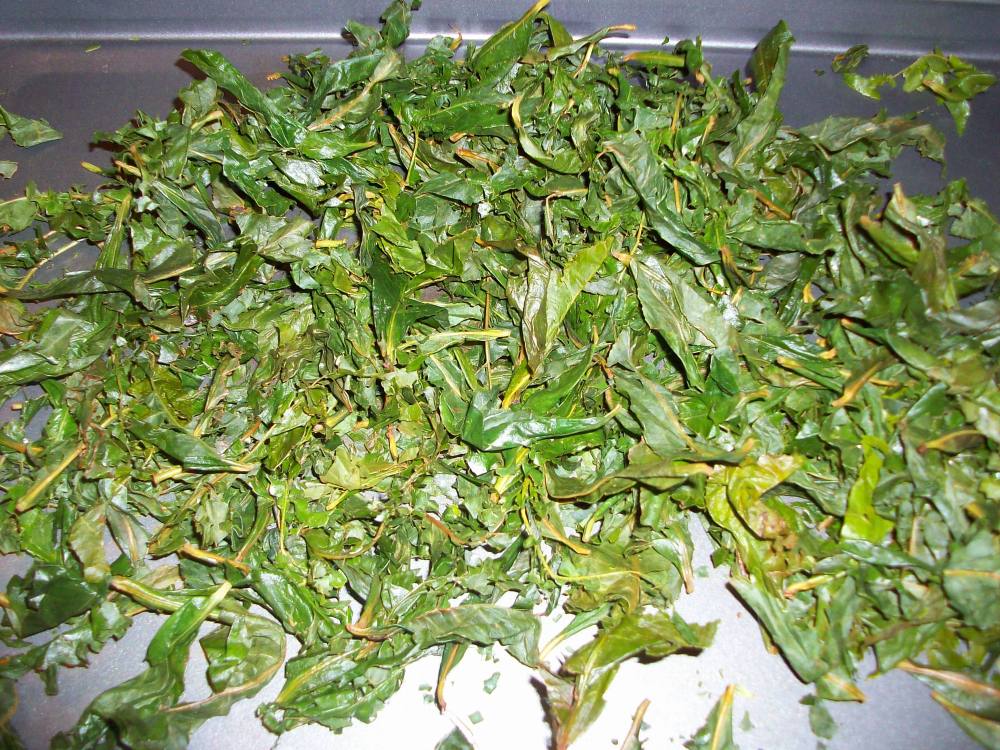
Each step in rolling can take any where from 2 to 5 minutes, with total rolling time per batch 15 to 30 minutes depending on the amount of pressure applied. What you want to look for is a sheen and white sappy substance to form on the leaves. This is the juice. This is what is going through chemical changes in the next step that forms the flavor. There is balance between a sheen and a very wet look and very sticky. As soon as the leaves become wet, which will come after the appearance of the white sap, it is time to stop rolling and start the next process. By the way, did you remember to wear those latex gloves, because if not, your hands are going to try black and be like that for a few days.
For the next step you will need a spray bottle filled with water, gallon sized zip lock freezer bags, and small portable air pump like for an aquarium with tubing. This step is the oxidation step. It is called the oxidation step because it requires oxygen as part of the reaction and there is an exchange off of electrons from the chemical substances in the juice. As you finish each small handful batch of leaves from rolling, you should take out a freezer bag spray one burst of water into it and fill the bag up 1/3 to 1/2 half full. Slowly begin to seal the bag but leave a small opening in the seal. Turn on your air pump and insert your tube into the bag and let it fill completely up with air. Once it is full of air, quickly remove the tube and finish sealing the bag. Set the bag on the counter and set a timer for 1 hour. With your house being around 72-76 degrees F, the bag holding a small amount of moisture, and the fresh air pumped into the bag, you have very good conditions for oxidation. The reason why you don’t simply blow into the bag is because when you exhale it is mostly carbon dioxide. While you let the bag sit, you can start on the next batch rolling and put it into another bag. Keep a rough track of when you started the oxidation process, the timing of finishing each bag and when you finished filling the last bag. Because you only want the tea to oxidize for 5 hours before drying it, and exchanging the air once a hour during that time period.
Each and every time you open the bag, it is important to toss around the leaf. You will notice that it starts to change colors from green to orange to a light brownish tan, particularly the stems, petioles, and parts of the leaf that was bruised real well. Once you have allowed the bags to finish oxidizing for five hours, it is onto the next step of drying.
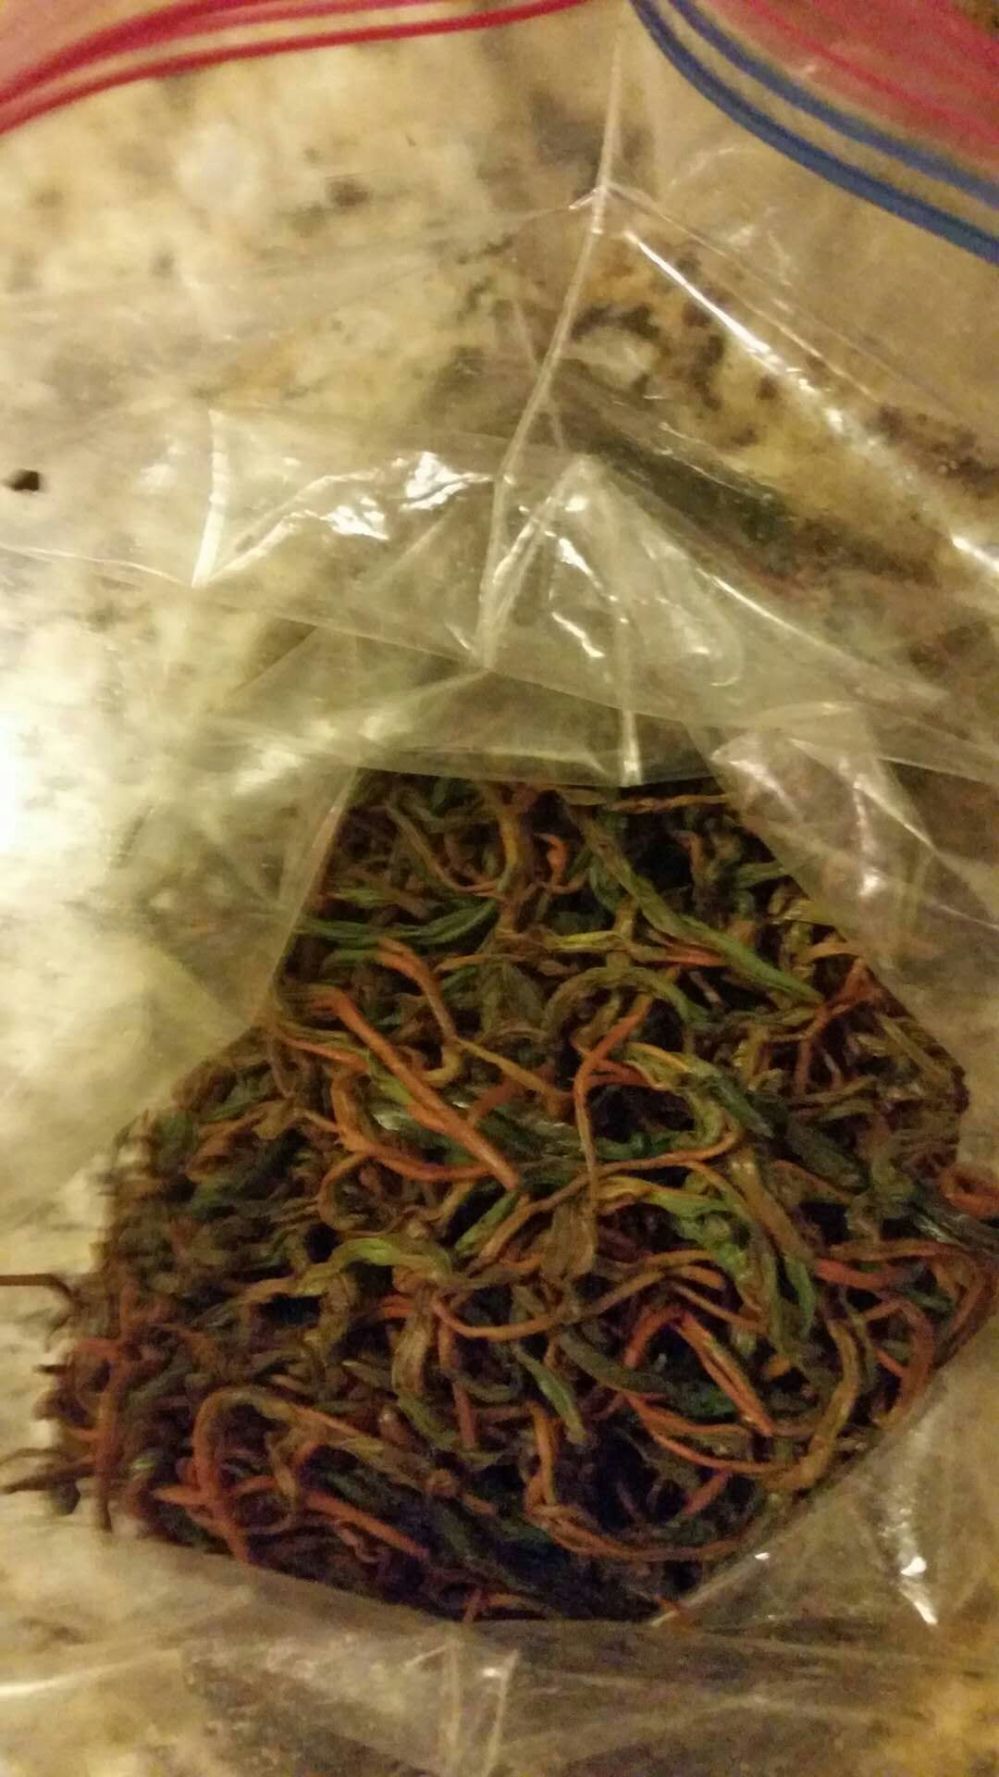
To start the drying process preheat your oven to 180 F. Carefully and slowly empty the bags of oxidized tea onto foiled cover baking sheets spreading them evenly and thinly across the sheet. Once the oven is ready, place whatever number of sheets you can fit onto your center rack of the oven. Set a timer for 1 hour and 6 minutes and let dry. After the 1 hour and 6 minutes, remove tea from the oven and flip it over, so that it dries evenly. You have to remember you are basically sweating the moisture and drying the flavor compounds. Return the sheets to the oven for another 1 hour and 6 minutes. Remove from the oven and allow to cool. So after a total of 2 hours and 12 minutes in the oven, what you pull out is finished handcrafted orthodox black tea.
Once the tea has cooled, place it back into a bowl to measure the final mass of the tea, remember when recorded the initial mass of the raw leaf. Well here is how we are going to calculate if we did a good job or not.
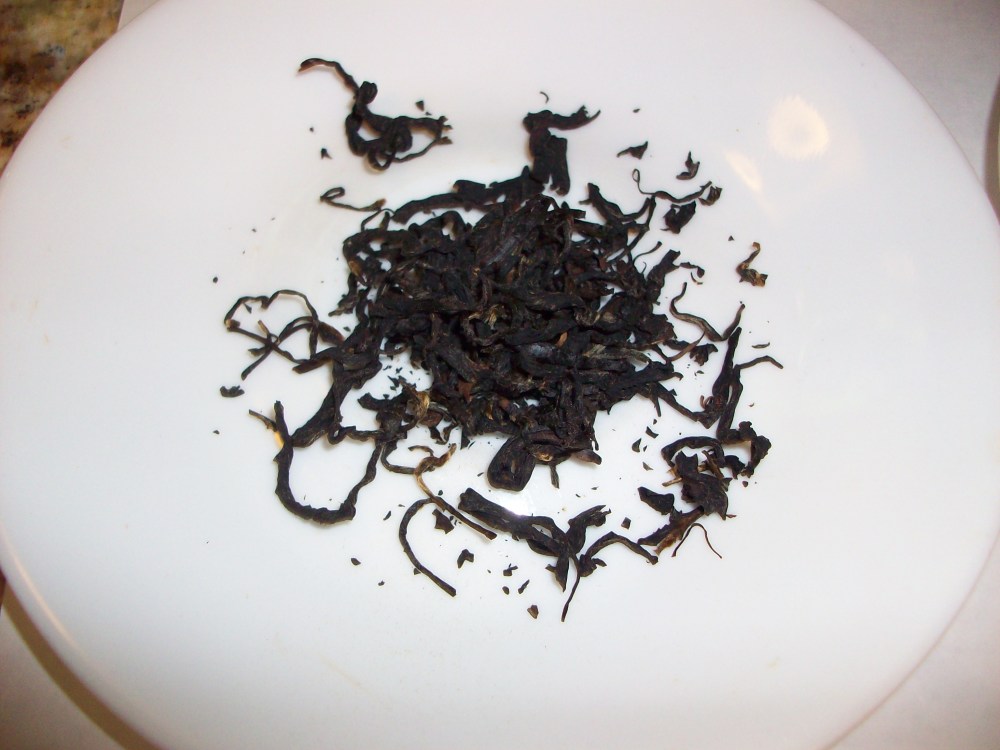
Take the total mass of the finished tea and divide it by the total mass of the raw leaf, it will give you a percentage number in decimal form. If your percentage ranges from 20% (.2) to 30% (.3), then you are in the range, yet if you percentage is 25% (.25) to 28% (.28), this is ideal because you had a 75% to 72% reduction in mass. The next step is to store it in a air tight container out of sunlight. The fresh flavor of the tea will keep for at least 6 months up to a year’s time.
Yet the most important step out of all of the steps in processing is the last step, tasting it. Because after all the time and energy putting into making the tea, the reward isn’t realized until you have tried your first cup of it, good or bad.

Regardless of how you want to make a cup either western style using 2.2 grams per 6 floz or Fuijian style 3 grams per 5 floz, the most important aspect to tasting is to ensure that you made a quality tea. Being able to steep the tea 3 times and get a consistent flavor in all three cups is the sign of a quality tea. In a western style that would be 3 steeps at 5 minutes each, while in Fuijian style it be the first steep at 3 minutes followed by the 2nd and 3rd steep at five minutes. Now it is not completely unreasonable to taste a difference between the first and third steep, but that difference should only be slightly noticeable. We refer to the changes in the strengths of tea as “dropoff.” We want our first and second steeps to be identical, maybe a hint of a dropoff, very small and only detectable after numerous sip comparisons of the two. A dropoff from the first to third can be noticeable but should not be more than 1/8 to 1/4 quarter in strength, even a 1/4 is liberal.
An excellent quality tea will taste consistent through 3 steeps and have very good flavor. Too many people value the 1st steep flavor of teas and discard it afterwards. Even a good flavor tea that is consistent across 3 steeps is more valuable than a 1 steep excellent flavor tea. So keep this in mind in the future when purchasing teas, especially when you have a chance to taste it before buying it.
Now since we have shared this method with you, we hope that it helps you in the future connect back to tea with a hands on approach. Growing and making your own tea is not going to have a profound effect on the world market. It is not going to negatively affect small holding farmers across the globe. It is not going to make you any money either. If anything, it will make you appreciate more the hard work and artisan craftsmanship from those farmers. As much as you might want to us this method as a spring board to get into crafting your own teas like others from around the world, there is a few things that will stop you. First, the climate and soil, where you live and where that favorite tea of yours is produced are two different places. Second, the genetics, that small farmer that you love to purchase tea from over the internet or other forms has their specific genetic stock. The thing about those genetics, they are accustomed to that climate and soil. So even if you could import those genetics to where you live, you wouldn’t get the full benefits of the genetics. Third, the artisan craft, unless you have the time and resources to study tea making in whatever region you choose you might make something similar yet it still would not be “Darjeeling, Assam, Yunnan, Fuijian, Shan-Vietnamese, Japanese, Korean, Georgian, or Taiwanese,” it will be your tea and your flavor. That within itself is something to proud of as well.
So where does one find good plants with good genetics to grow and make tea from? First you don’t buy seeds off the internet, good way to get ripped off, plus if those seeds come from abroad you legally need permits to import. Second, there are several companies that sell plants online within the US, yet when I have asked for samples of tea that they have made from the plants they sell, not a single one of them sent me samples, so I am suspicious, not to say it won’t make tea but I would not buy in too deep in the quality or flavor of tea being made. I do know of one commercial source down in Mobile, Alabama that has a commercially proven cultivar hybrid but the only problem is that cultivar has super high tannins, so unless you like adding milk to your tea, I would not recommend it. There is a cultivar called, “Tea Breeze” from what I understand it came from commercial proven genetics as well. Others and myself are currently breeding and evaluating cultivars for future markets, yet that takes time. I do know that one tea farm from Virginia is working with a nursery in North Carolina to sell plants from seed. So maybe next year there will be some plants of excellent genetics for sale on the market, which not only are flavorful but tends to be a little cold hardy since it has some ancient Korean heritage within its’ genetics. (I have had tea from the plants producing the seed, it is excellent!) So until a good reliable source for plants comes available, I would stick to buying plants from one of three places, Camellia Forest, Camellia Shop, or Nuccio’s Nursery on the west coast. If you can find or have your local garden center get you the cultivar,”Tea Breeze” I would start there as well.
I don’t have to explain or go over from a health benefits point of view of how making and drinking fresh tea is beneficial, because there is a lot of legitimate medical and scientific research backing those claims. Plus from the point of view of an outdoor physical activity, be it young and old, it is also beneficial.
Before I finish this article up, I do want to mention one other thing. This is just the second of a series of other articles that we will write on the topic of tea cultivation and tea in general. We felt this was the most important to talk about first, since it has been the roadblock in the United States. We have a method for making white tea and green teas. In the future we will cover them. We will also cover all the other related topics as well, because for myself, my family, and my company we are in it for the long haul with tea not only in the United States but also together with our friends across the world. We really hope that you have enjoy this information, but most importantly we hope that this has helped you to “Grow Forward!”
Until next time, be safe, be happy, and take care of one another!
Joshua
All color photographs are the property of Hortfire LLC, non-color photographs are property of the USDA and utilized for educational purposes only.
