
In the past we have posted about doing asexual propagation of Camellias through vegetative cuttings in the winter time. This is an excellent way to preserve the genetics and reproduce plants that are “true to type” from their mother plants.
For some, asexual vegetative propagation (with the exception of air layering) is nothing but an uphill challenge with consistent failure, without training and in most cases specialized greenhouse structures and irrigation mist equipment. Granted in a previous post, I showed everyone a low cost way to get around most of that.
For many people who are trying to break into and cultivate the emerging tea industry in the United States, they are choosing a different path to establish their fields, they are using seeds.
Seeds and sexual reproduction are important in breeding and creating and maintaining genetic diversity. Seeds are typically seen as a inexpensive method to bulk up a number of plants to initially establish with planting. Fields that are typically multi-clonal/cultivar (high diversity, low homogenous populations) typically have a nice flavor when harvested and processed, yet their draw back is the uncertainty of uniformity of yield and in some cases flavor through the course of the season with the crop. In one sense, fields that are constructed this way are essentially “blended” tea fields because of the potential variety in flavor.
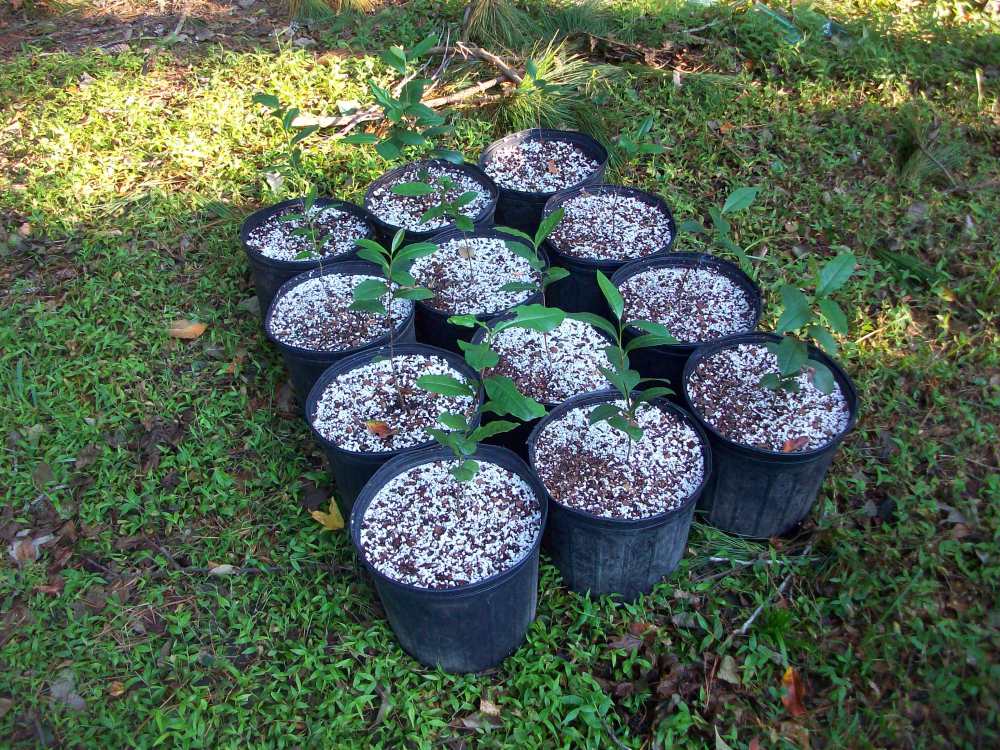
There is some confusion when it comes to seeds and plants produced by cuttings. The confusion is due to lack of understanding, because from my experience, there is essentially no difference between a seedling and small plant from cutting. Scientifically speaking there is no reason there should be any difference between the two as well if all things are equal. If the seed and cutting are planted and stuck at the same time of the year and are potted up and cared for equally, there is a difference in size height wise, yet not significant that it doesn’t warrant the same amount of attention when weeding after initial planting. Seedlings may fare better when planted when it comes to drought tolerance, because hypothetically they can draw moisture from deeper areas of the soil, still doesn’t alleviate shallower roots from being dried out. As far as deep mineralization nutrient uptake being an advantage, again this is only potential 10-20% of total nutrient absorption, because 80-90% of ALL nutrient absorption comes within the top 16 inches (40.46 cm) of the soil by secondary feeder roots. Then there is the claim that cutting produced plants are “swallow rooters,” again I have never seen research to back this claim and furthermore every cell in that plant has the genetic ability to transform into hypothetically any part of that plant, hence the whole reason why you can root cuttings in the first place. Additionally, of all the plants I have rooted from annuals to trees, the cuttings eventually form a main leader for which all the other roots can branch and form lateral roots and secondary feeder roots. Below is an example of seedling vs cutting that where both propagated at the same time in 2019, both plants are average plants from their respective growth blocks in the nursery, all things being equal.
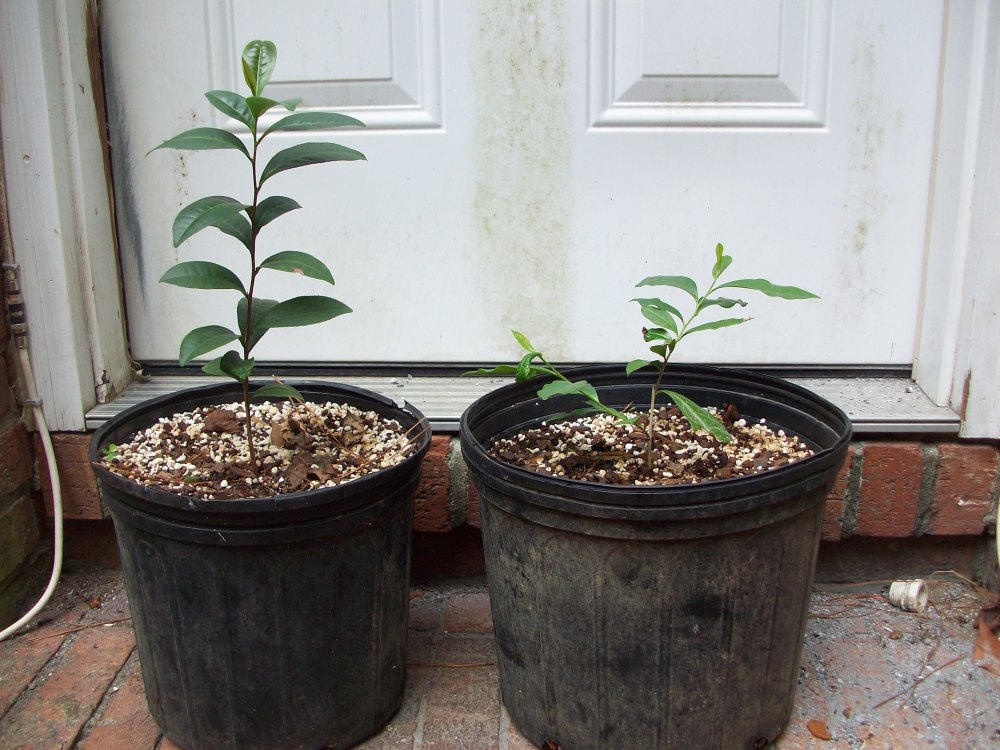
The plant on the left is a seedling, while the cutting on the right is the 5 seed pod that was found out at Caw Caw. The seedling is approximately 12 inches (30.48 cm) tall while the cutting if staked up would be 8 inches tall (20.32 cm). While the seedling is taller, it is not that much or significant, yet something else to take into consideration that is not pictured here is the root mass. The total root mass of the cutting is larger than of the seedling. While the length of the roots are smaller for the cutting, they are more branched and have more secondary feeder roots developed. So it is very realistic to say that the difference in height and root mass comes is reflected in how the plant’s utilized and stored the sun’s energy relative to its’ phytohormone balance between auxins and cytokinens. You have to remember that both of these where planted initially the same day, they where potted up on the same day, and they received the same amount of fertilization through out the year. One must also consider the genetic age of the two specimens as well, the seedling being very young, while the cutting comes from a mature tree, when I say mature, approximately 13 feet tall (3.93 m) with a main trunk breast height caliper of 2 to 3 inches (5.08 cm to 7.62cm), and this is cutting directly from the mother plant, versus a cutting that is 3 generations away from asexual vegetative propagation which tends to be more reinvigorated due to subsequent care of previous generations.
Growing tea plants from seeds is very important because it is the method that gives us genetic diversity, naturally. Clonal/Cultivars are nothing more than seedling plants that were selected for a reason, the reasons can vary from flavor, yield, cold hardiness, pest resistance, and so forth. Breeding programs of clonals/cultivars whole purpose is to produce seed(s) that have the potential to have desirable traits from both parents. In some instances you have controlled cross pollination and fertilization by hand and in other instances you have bees and insects that cross pollinate the flowers, yet the end goal is to produce seeds.
Since we have addressed the differences between growing from seed versus planting cultivars. It is time we address harvesting and storing seeds. So recently, several other fellow US tea growers and myself, started swapping some seeds with one another. Each of us had some unique genetic pools that the others did not have. Again, here we are promoting diversity of genetics by just exchanging seeds. I have received one set of seeds so far and hopefully will have the other set of seed in the near future. While I have my own genetic library, I know that both of these sets of seeds come from plants that make very good to excellent quality teas. So I know the pedigree in genetics is there, these seeds come from two different tea producing regions in the world outside of the United States, so it would not be in my best interest to take advantage of the opportunity to cultivate them and start a breeding program between the two.
Obvious the first step of harvesting them has been done for me. Traditionally, here in Charleston, SC our seed harvesting season begins from mid-August through until flower blooms, early to mid October. Yet for those who have never harvested seeds, the harvest time can vary depending on where you live in the world. For example, the first set I received came from Hawaii and was harvested around mid June. Hawaii does not have a winter and is more equatorial, so the difference in changes in day light a lot smaller than in Charleston. So there is essentially continuous growth and development year round in their seeds, hence harvesting 2 months before we can. The further north you go above Charleston, the longer you need to wait, yet most places where tea can grow in the eastern US, the 2nd or 3rd week would be ideal. Then again, you can also always tell when they are fully ripen, as where the three capsules on the bottom of the seed come together starts to crack open.
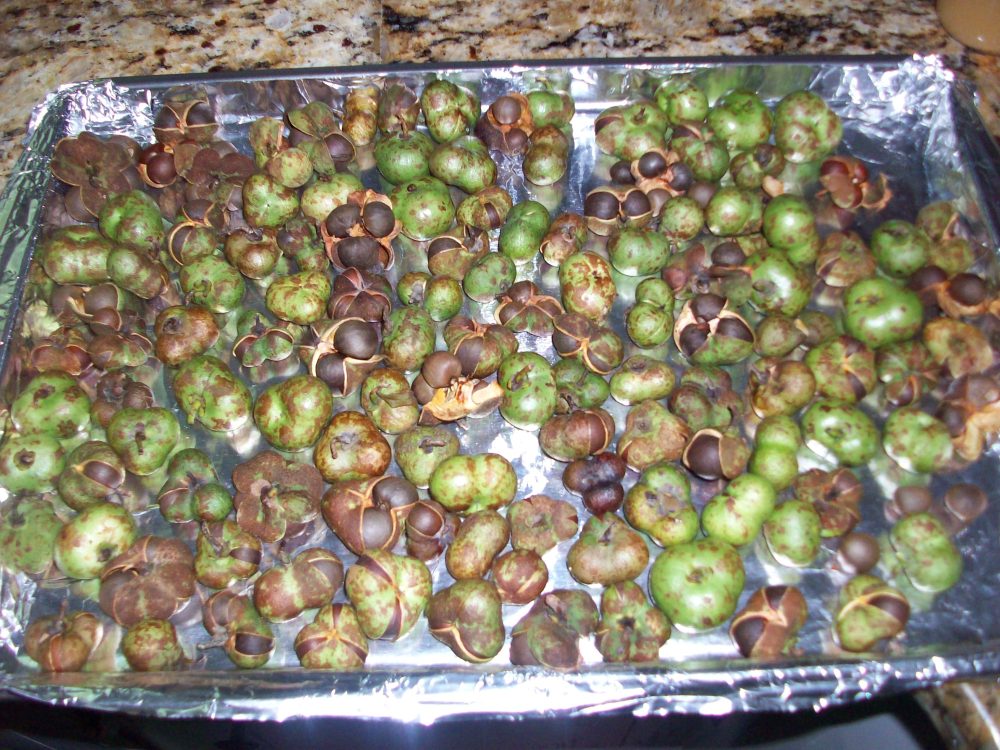
The next step is the “dehusking” process. This step and method saves time and energy, granted I am sure there are other similar ways that follow ancient proven methods, yet the process I am going to describe here works. Simply take a baking sheet lined with aluminum foil and lay your seeds out on it indoors in a climate controlled room for 7 to 10 days. The cool dry air will help the capsules crack open, just like it normally would in the fall time. Remove the three seeds (or if you are lucky 4 seeds) from the capsule and discard the hulls. I would not compost them unless the seeds you have came from your plants, otherwise incinerate them to neutralize all potential pathogens.
The next step is “phytosanitary procedures”. While I normally would share information on this procedure, unfortunately in this blog post I am not. The reason why I am not going to detail a phytosanitary procedure is because in no way do I want to help the potential for a “blackmarket” seed trade into or through the United States or any other part of the world. I will describe the basic of what a phytosanitary procedure and why it is important. Phytosanitary procedure is a methodology that prevents the transmission of pathogens, be it a direct pathogen or indirect pathogen (affecting non-carrier host). It is a cleaning process that if conducted properly, insects, diseases, nematodes, and any other potential contaminate and pathogens are neutralized while the plant or seed survives and grows to be pathogen free. If you are purchasing from outside the United States (or your home country for that matter) more than likely the seller will have to provide a phytosanitary certificate along with customs documentation for exportation. Most countries require this because of the economic importance of the tea industry to them. Some countries, including the United States, require an importation permit to be obtained by the buyer, which in the USA is attained by the US Department of Agriculture. Even then once your seeds are sent to the United States, there traditionally is an inspection of them once they are delivered. If you are a US citizen, realize this, if you think cutting a corner and breaking the law and regulations on this is OK, then also be fine with US Customs and USDA paying you a visit and furthermore if you do import a new pathogen and it affects someone else’s operation, you also need to understand you are LIABLE in civil court. No amount of insurance will ever cover what is deemed criminal activity. Talk to your local extension agent and officials at the conservation district office. Let them help you get all the right information and paperwork if this is what you desire. Personally, because we do not have a lot of economically destructive pest here in the United States, that importation of seed to be left to land-grant universities or to anyone who can prove a cultural ancestral connection with the seed they are importing with careful monitoring.
To anyone overseas who may be reading this, while it may sound or seem lucrative to by pass laws and regulations and to sale seeds to online buyers in the United States, there are unilateral agreements between countries that prevent this and numerous treaties that enforce punishment for those caught, simply put, follow your laws and regulations, and if your government cannot help you, then contact the US embassy or consul in your country for guidance as well.
The third step is to prepare and place seeds into cold storage, so that they can stratify (accumulate enough hours of chilling to break down inhibitors). Camellia seed doesn’t necessarily need this to germinate, as they will germinate once harvested yet research in the United States has shown with Camellia species including sinensis, that stratification over a period of 90 days yielded more robust germination than non stratified seeds. So the comparison was between seeds stored in cold environment versus stored in a warm dark environment. Again, it is not necessarily required, yet most places with the exclusion of Hawaii, does experience winter conditions, so cold storage will help preserve the seeds until the following Spring, when conditions are favorable for planting.
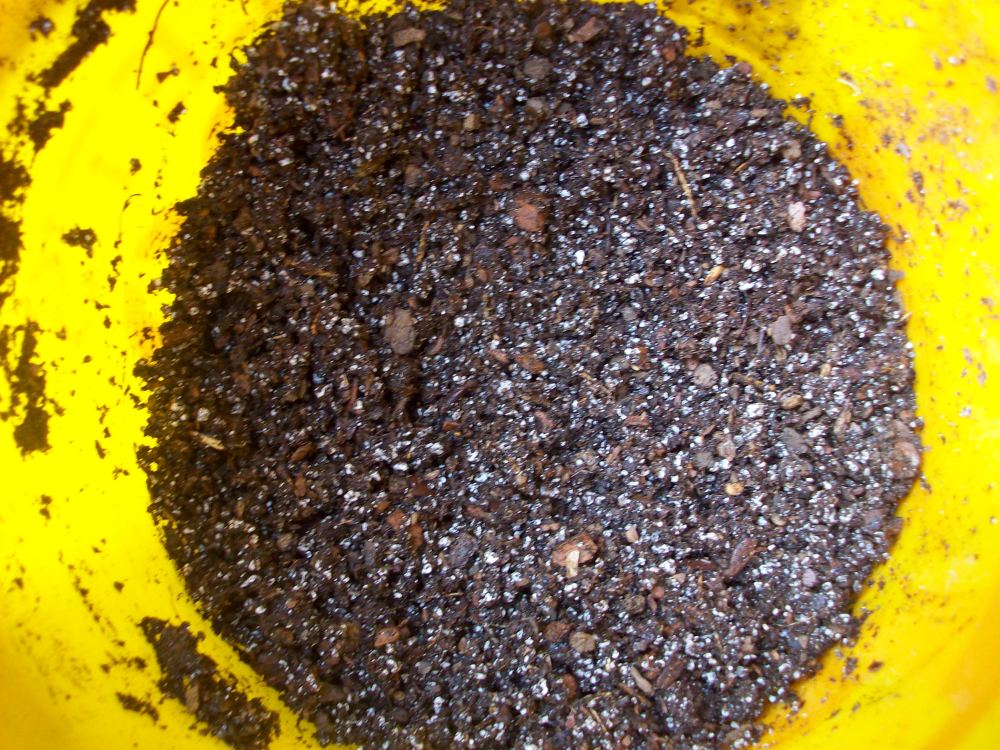
The first step is make a media to fill in the bags with the seeds. The media consist of 1 part perlite to 1 part peat moss to 1 part pine bark and moisten to where 85% to 90% is wet and there is still some barely dry particles. Once the media has been mixed and moistened, take a spray bottle of water and spray into a 1 gallon zip-lock freezer bag two times, fill the bag of “sanitized seeds” no more than 50%, then add the other 25 to 50% with media. Close the bag and begin to shake and move the seeds about within the bag so that the seeds and media are relatively uniformed. Once the seeds and media are uniform, slightly open the bag and press out any extra air space and reseal the bag. Mark each bag with some identification name and also the date of harvest and date stored. Repeat this process until all the seeds you have are packaged. The take the top flap and use a piece of packing tape to fold over and tape in place the zip-lock so it does not come open prematurely. If you have multiple seeds from various different sources yet the bags are not completely full, then put various seed packages into another freezer bag. Once all the seeds are neatly packaged, then place in the crisper drawer of your refrigerator until the desired time to pull them out for planting. Pull the seeds out of the refrigerator and allow to sit at room temperature for 1 day, before removing the seeds, washing them of debris, and begin the culling process.

If you think the argument of seed versus cuttings was controversial, well, the next step and topic, truly does take the cake when it comes to Camellia tea seed planting. The fourth step we are discussing is essentially the “floaters versus sinkers” when it comes to seed. There is one side that says, it doesn’t matter and then there is another side that says it totally matters. Well just like the seed versus cutting argument, I say there is a lot of confusion and misunderstanding. Hopefully, I can shed some light on the process known as “water culling,” and why it actually is important to do, once you have removed seeds from storage before planting.
I am going to talk about the process of “water culling” and then break down some aspects that are typically ignored or not acknowledge in this battle of the ages. My former instructor, Mack Fleming, (former station director of Lipton Research Station Wadmalaw Island, SC and co-founder of Charleston Tea Plantation) taught me this method and reasoning behind the method. Some where through time, the concept has been muddled far away from the truth in my opinion. Again, I hope this gets everyone on the same page.
Once you have removed the seeds from cold storage and let them sit at room temperature for twenty four hours, it is important to rinse them to remove any debris or media stuck to them. Then get a large container that can hold water and fill approximately 50 to 75% full of water. Pour you clean seeds into the water and wait twenty four hours.

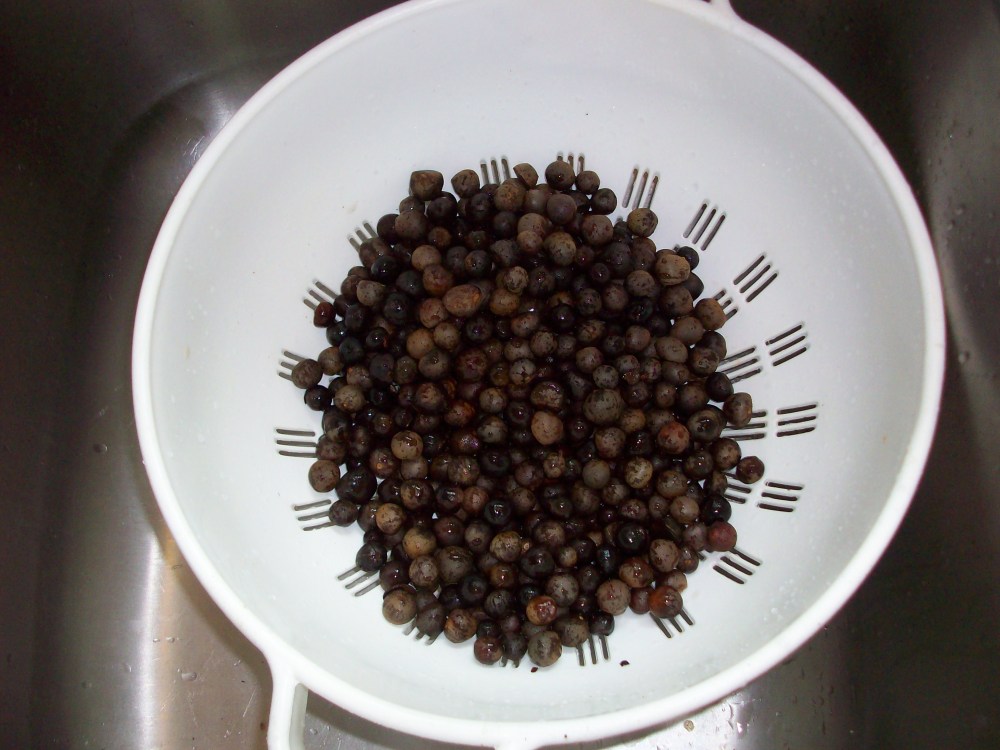
After twenty-hours, the seeds that have fallen to the bottom are considered grade A, excellent seeds. Remove the sunken seeds into another container 75% full of water to hold before planting. After forty eight hours, remove the seeds that have fallen to the bottom as these are your grade B seeds, very good seeds. The remaining seeds floating are your grade C seeds remove them from the water and keep them separate.

The reasoning for culling the seeds into grades has more to do with the economics of planting. So for the time and money invested of putting one seed per container, you want to use your best seeds. Both A and B grade seeds are worth the investment to pot up individual. Now don’t confuse this we me implying 100% germination, more simply put the chances of a high failure and financial loss are very low, especially with grade A, grade B is still low but you may notice that plants from grade B maybe slightly smaller than grade A. So what about grade C, the “floaters,” depending on who you ask you will get answers like “throw them away” or “pot them up.” I was taught that grade C seeds traditionally get planted into larger trays were lots of seeds can be sown, vs one seed one container. Grade C seeds will germinate, just typically not the majority and of those that do germinate they tend to be smaller plants in comparison to A and B grade.

As you can see above from the collection of “floaters” grade C, there can be anything to no embryo development to only half embryo development. Another step that can be taken to further cull grade C seeds is to squeeze each seed individually between the thumb and pointer finger to see if they are hallow or weak. If your concern is to plant only the most viable seeds, then squeeze them, yet if you have the resources and don’t care about germination rates or have a quota/ benchmark for the number of plants needed you can skip that step. If you are concerned about input cost, you can also skip the squeezing step. Just realize not mater what that grade C seeds typically require more care than A or B, once germinated.
To crack or not to crack the seed again to improve germination is another but minor consideration when it comes to Camellia tea seed germination. While ornamental camellia breeders may do things like slam the seed to form a crack in the seat coat, I have never seen a reason to do so with Camellia tea. I have never seen any research to support this either. If you want to spend the time and energy, then by all means do so, they are your seeds. Even if decide to crack the seeds or not crack the seeds, at this point you are ready to plant the seeds.
Since we have gotten to point of planting Camellia tea seeds, it only really means one thing. We have gotten to end of this blog. In the future, I will write a blog on the planting and germination.
I hope today’s blog has given everyone some new perspective on how to expand their genetic diversity in plantings, and it has destroyed some of those myths surrounding Camellia tea seed germination. Most importantly like each and everyday, we hope it has helped people to “Grow Forward!”
Until next time my friends, take care, be safe, and support one another,
Joshua
