
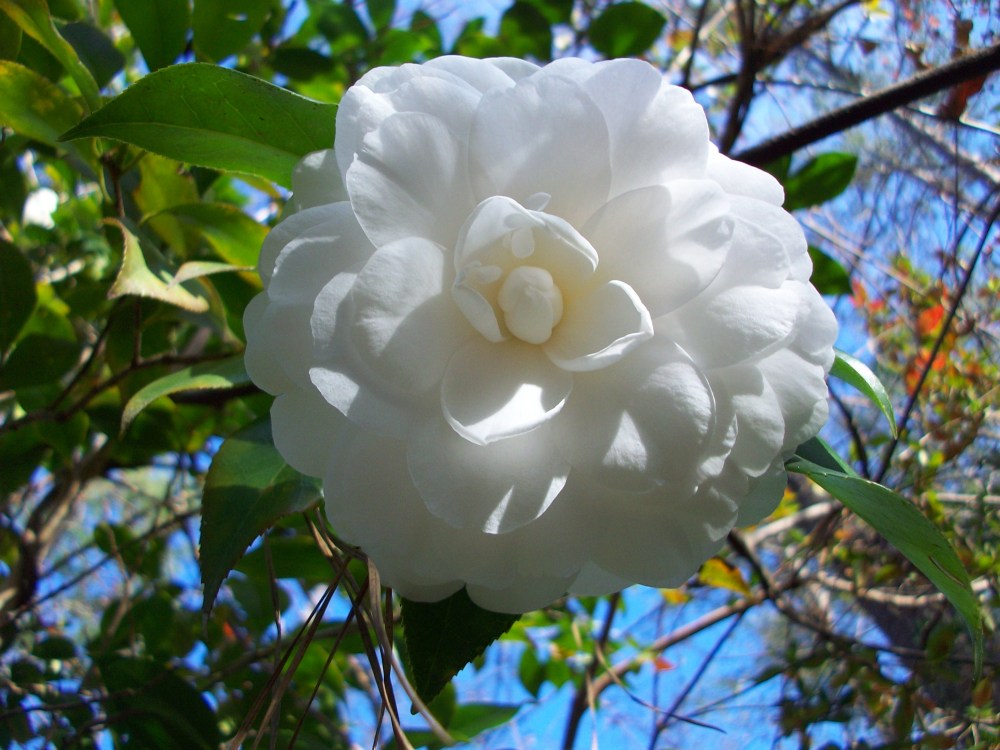
Let me first wish everyone a Happy Winter Solstice and a Festive Holiday. With the longest night passing this past week and the various holidays beginning to be celebrated, we wanted to do something special for everyone. We know a lot of you will be visiting friends and family over the next week or two. As you travel, you might see one of the beautiful gems of the garden blooming in full glory right now, the Camellia.
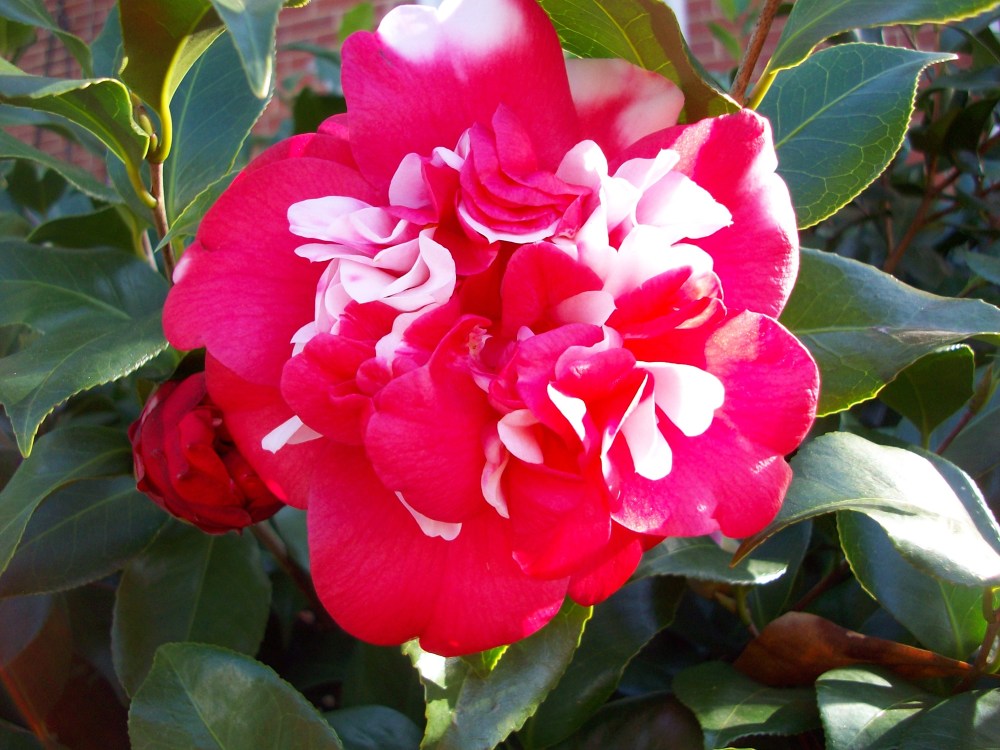
Picture of Camellia japonica “Governor Mouton”
This time of the year marks also a transition with Camellias. The last of the Sasanqua are blooming and we begin to see more and more of the Japonica species blooming within the landscape. We could go on forever about Camellias, but this blog post is not some in depth information background on them. No, this post is about how you or anyone else could propagate a camellia, so that you can have it within your garden. So if a friend, a family member, or neighbor down the street has one, you can too.
There are four reasons why I am inspired to write this post.
The first reason, because I wanted to dedicate this post to someone very special in my life, Sharon Coke. Sharon Coke was one of my instructors at Trident Technical College. She was like a mother, a greenhouse horticulture propagation mother. She taught me how to propagate Camellias vegetatively by cuttings. If you know Sharon, the is little room to miss any detail or fail to record any information. Sharon worked for Kramer Bros Company in California after she graduated from North Carolina State University. From mixing the soil, to collecting the wood, to making the cutting, all the way to doing it with a mist bench and by the glass jar method, she showed me everything I needed to know. Let’s be clear about one thing though, she showed me how to do it once, then watched me do it once, then told me to do, and then critiqued me on how to do it better next time.
The second reason, not to long ago one of my customers asked me to find a particular camellia sasanqua to infill a planting my father did many years ago. The cultivar seemed to be an easy find, I remember it being a pretty common one. So I went to the local garden center to look for it. I just need three one gallons, no big deal, right, nope wrong. A lot has changed through the years and Cross Seed Company has been out of business for quite some time. I went to another garden center, nope, went to Lowes, Home Depot, nope and nope, and I finally went down to Wal-mart and that is another negative. As the older “garden club” generation has left us for the “Great Garden in the Sky,” and been replaced by the next generation, the variety is not there any more. It is more about the highly marketed “brand name cultivars.” So what can we do to infill the planting? Well, we can propagate what is existing and plant back.
The third reason is because there is a ten acre tract of land that had a huge old house on it in my neighborhood. The tract is being developed into some 50 house subdivision. There are several old camellias still there, even though they demolished the house and built a deep drainage pond there. From what is left of the camellias, I am propagating them for my yard. Those camellias are goners always, still I know who ever planted them in the first place is appreciating what I am doing, plus it is adding some variety to what we already have.
The fourth and final reason kinda relates to the first and third reason, which is sharing the information of camellia propagation so that anyone could grow their own, especially if they are getting their propagation wood from a close friend or family member. (Think about how you always remembered that one your parents or grandparents had in their yard). You can keep and grow those memories, you can share them, sure it may be a particular cultivar, but it is a cultivar that came from someone’s garden.
So where do we begin? What is our goal? Our goal is going to create a space that will have high humidity and moderate temperatures for a period of time.
We need to find a nice spot facing southeast to south and gets at least 6 hours of filtered sunlight, 4 hours of direct light is good. If you are getting more than 4 hours of direct light, it is fine but you will need to watch it as we progress into Spring or the temperatures climb above 70. Next, we are also going to need to monitor the weather.
The lowest temperature we want to expose the cuttings to is around 50 degrees Fahrenheit. If the night or day time temperatures go below this, you are going to need to bring them inside, if you don’t have a cold frame. Just get a tin roasting pan, place it in a sunny window (or by one). That way you are not making a mess and if the containers leak water it is contained. If it is going to be a long cold cloudy week outside, add some artificial lighting. With energy efficient compact fluorescent or “outdoor spectrum” leds, adding an 100watt equivalent to an incandescent bulb (30 watt CFL or 20 watt LED) will help. Running the light for 6 hours is good. We are just trying to supplement natural lighting. There is no benefit by running the light 24 hours a day. If anything, when you come home in the afternoon around 5pm, turn it on and turn it off when you go to bed, even if it is only 3 to 4 hours of extra light. Another thing that can help but is not required, placing a heating pad under the tin pan, with a low setting on when you run the light. If you want to get fancy, you could hook both up to timers so it comes on and goes off, while you have your cuttings inside. If you have a cold frame that is heated, some people call that a hot house, you really don’t have to do anything. You could set-up a timer and add some supplement light to go on between 1:30 am to 3:30 am. This interrupts the daylight interval to create a short night situation. The same happens when you leave you light on past sun down in your house. If it is going to rain, frost, freeze, or snow, it is important to bring your cuttings in. If for some reason you forgot on the way out the door and it rains, don’t worry, just bring them in once you get home and adjust your watering and misting.
If the daytime temperatures get up to 75 degrees Fahrenheit, you won’t have to do much. If the daytime temperature exceeds 75, you will need to do some modifications, they are simple and we will go over them down below. Remember we are going to create a modified environment for your cuttings, rooting them now, will give you an advantage to use the coming year to grow them off and potentially make nice presents next holiday season. Now we can move onto the supplies you are going to need.
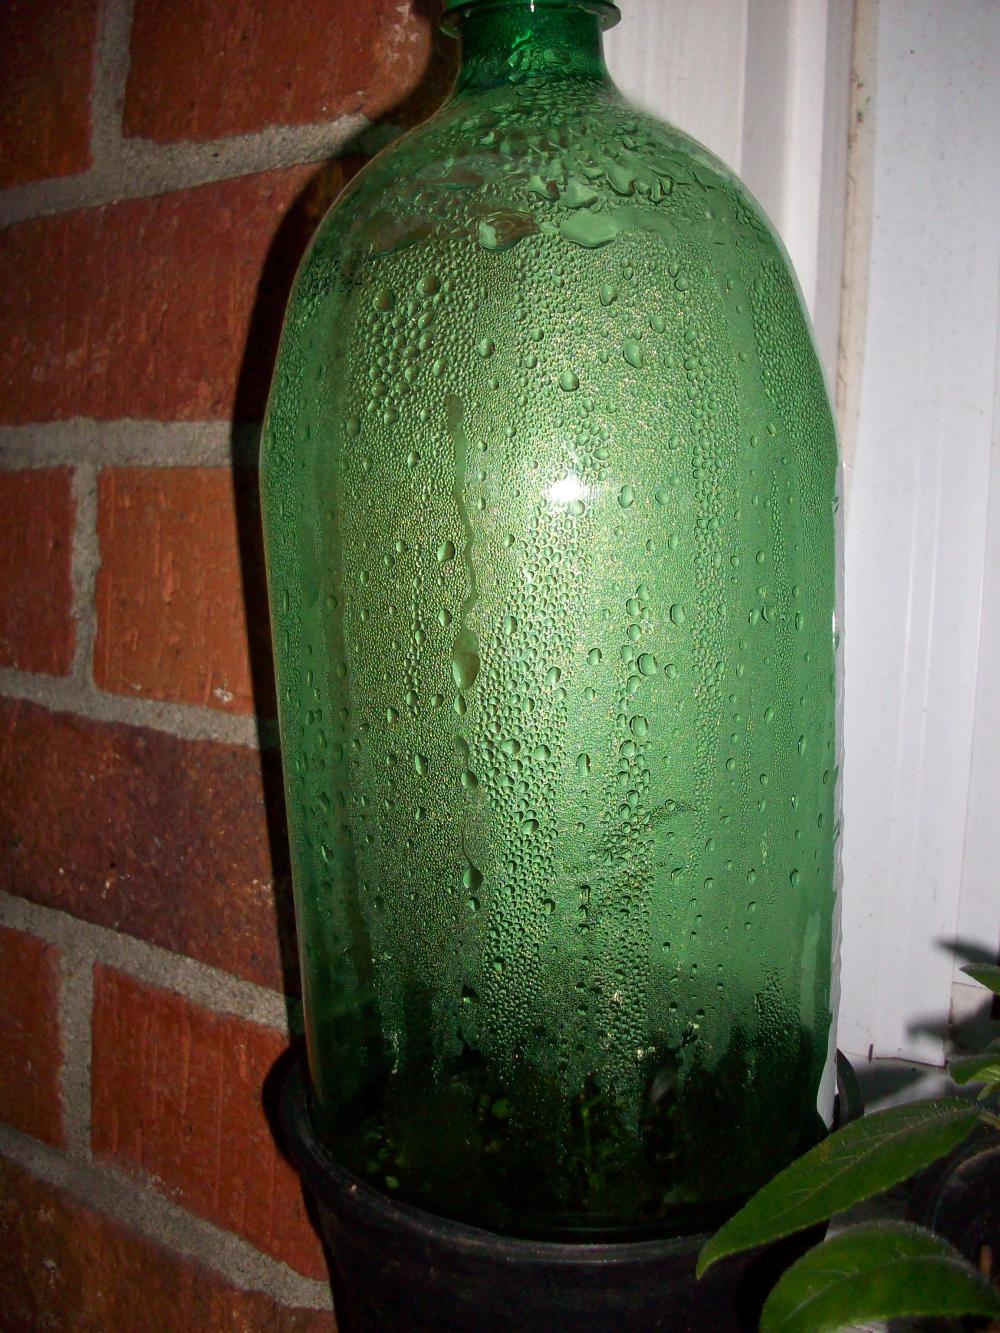
We are going to need some potting soil, containers, rooting hormone(s), a spray bottle that sprays a mist pattern out, and some 2-liter bottles. We are going to build basically little terrariums to propagate in. This is a pretty low tech method to root plants. I am going to break each of these components down below.
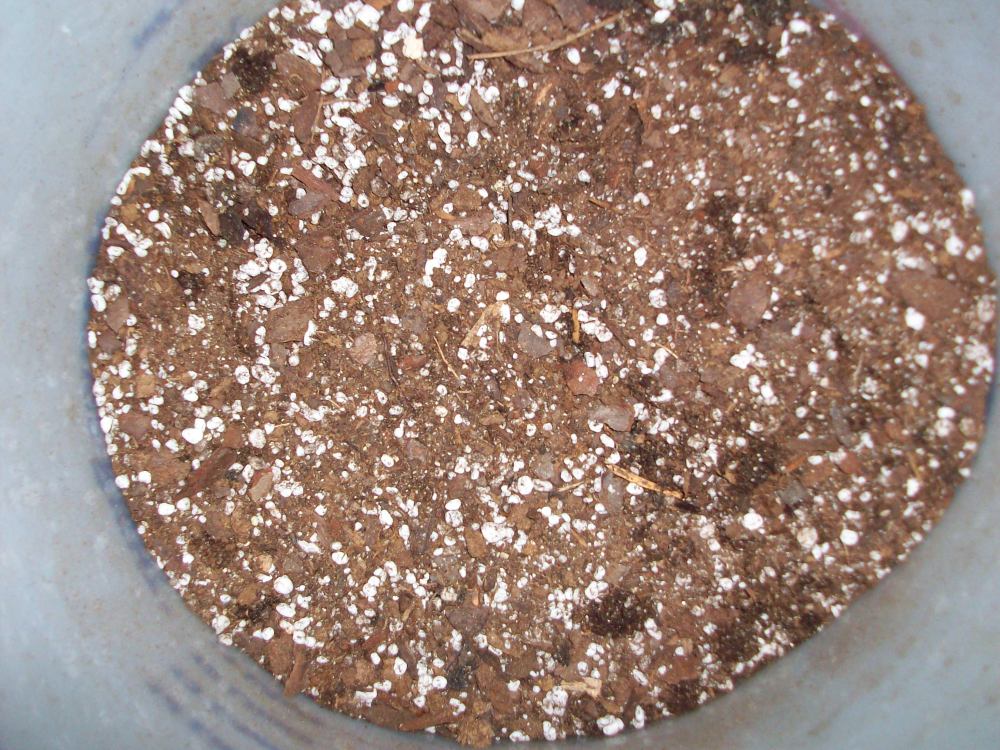
This potting soil formulation is one of many that can be constructed. This potting mix I am using contains 6 parts Perlite, 3 parts pine bark nuggets, 3 pasts of peat and 1 part vermiculite. This mix is a little heavy on the water holding capacity side, but for good reason, that extra water will eventually be evaporated off to cool or be helded, it creates a temperature buffer of sorts.
For those of you that become successful doing this several times, I would also recommend adding greensand at one part as well. Greensand is a mica material, just like vermiculite. Just like vermiculite it can be wetted easily. I typically mix vermiculite and greensand together first, then add one part of the perlite, then one part peat moss (that has been fluffed), a part pine bark, then two parts perlite, one part peat, one part perlite, one pine bark, and one part perlite. Continuously mix this media until it has a consistent texture to it. You can do it in a wheelbarrow, or use 2 five gallon buckets. Typically in propagation using mist benches, you would moisten the media grab a handful and squeeze it into a ball. If you release it, it should hold that ball shape but crumble easy if you smash it gently with your thumb. If falls apart after squeezing it, it is too course, add equal peat and pine bark, if the ball doesn’t crumble with slight pressure, it is too fine add more perlite. So if you have a mist bench set up, this is roughly what you want. Then again, we are not using a mist bench, so we want it a bit heavy.
If you don’t have or want to buy all the components and need an easier way to make the soil mixture. Go 2 parts potting soil (peat and bark based) to 1 to 1.5 part perlite depending on the potting soil being more peat or pine bark. If it is more bark based go with a 2 to 1 ratio.
Once you have the right mixture, the next step is to fill your containers and wet the media. Below is an example of the container I am using.
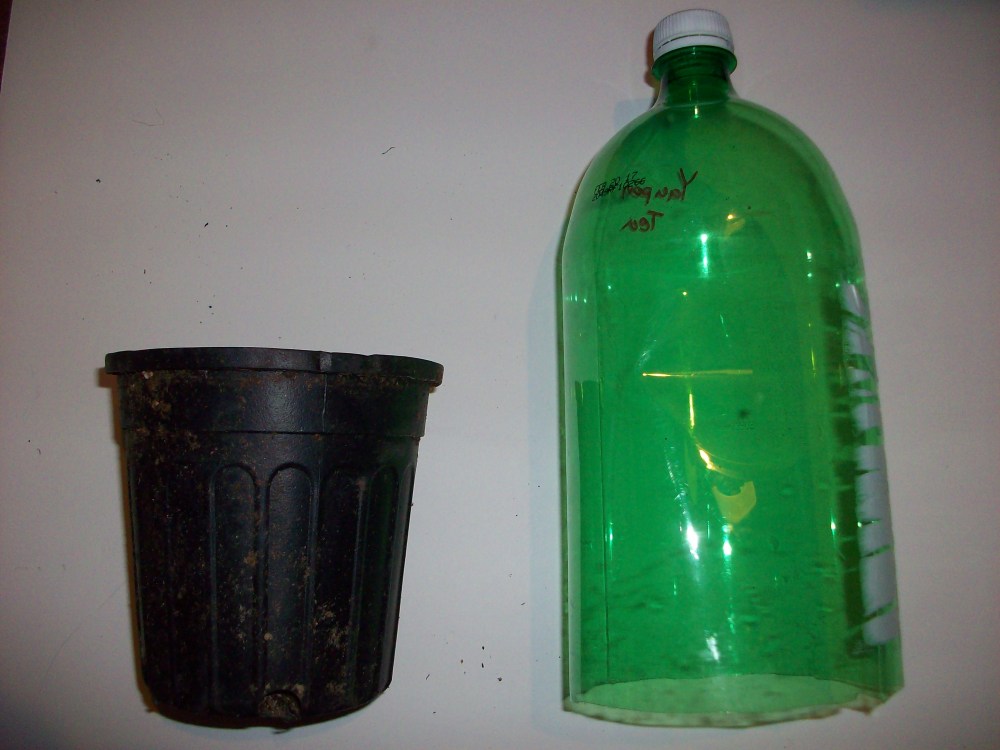
The container I use is a “Classic 100” by Nurseries Supplies Inc. It has a 4.25 inch opening (inside measurement). You can use a similar container that has an opening at 4.25 inches. I do not recommend the use of terra cotta clay, as it breathes easily. 2-liter bottles fit perfectly into them. If you can’t find any pots with 4.25 opening, look for 3.25, because 1 liter bottles fit into these and the only difference is that you would only stick 2 cutting instead of 3 or 4 in 2-litters.
Once you have your containers and lids, it is time to fill the pots with media and wet the media and allow it to settle. Here is a huge word of caution, peat moss takes some time to get wet after it has become dry. Please be patient when watering in the media. Fill the containers up to about a 1/3 to a 1/2 inch from the top of the container. Then slowly apply water through a watering can or a breaker nozzle. It can take up to 15 minutes to water in the container properly. So before you even start the water pick up a container with media in it and denote the weight. Start watering slowly, making sure the media doesn’t float. Allow the water to drain, refill the container, and after several sequences of doing this, stop and pick up the container and notice the change in weight. Keep continuing to do this until several things happen, number 1 you do not set air bubble come up and that container feels about 3 to 4 times more heavier than it did in the beginning.
Learning the weight of the container and the amount of moisture within it will be important. Once you feel the container is heavy and the water slowly draining, the soil should be settled in. Allow the excess moisture to drain from the container.
Now that is prepped, we can focus our attention on gathering “cutting wood.” When gather “cutting wood” it is important that you do not collect diseased or insect infested wood. One of the most common insect infestations of camellias is scale. The pictures below is an example of such.
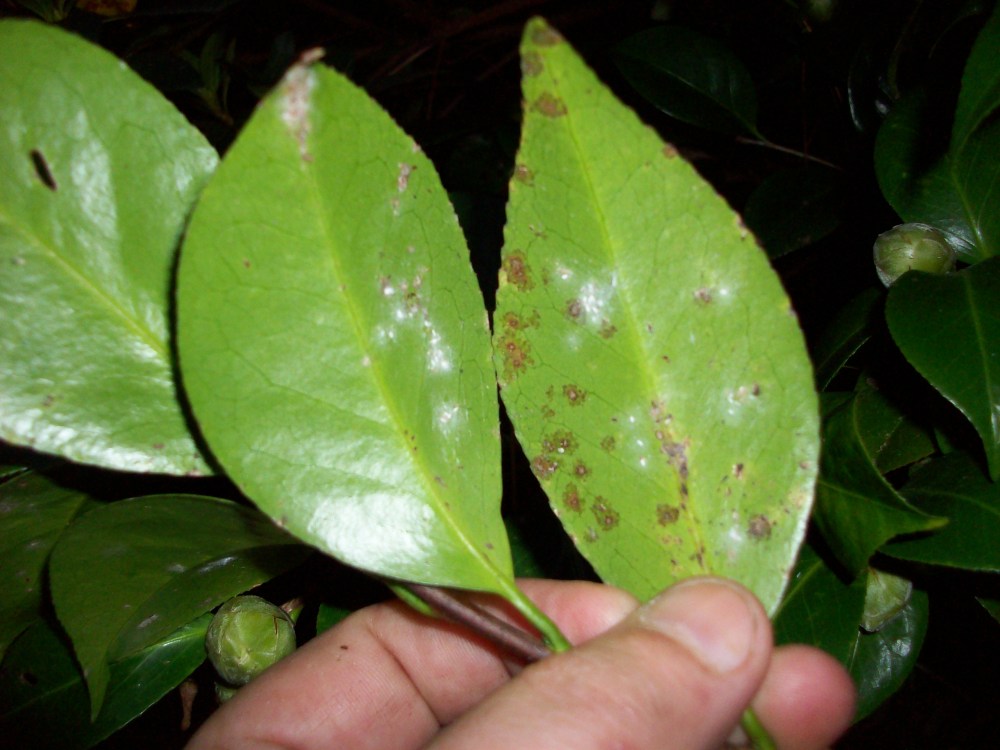
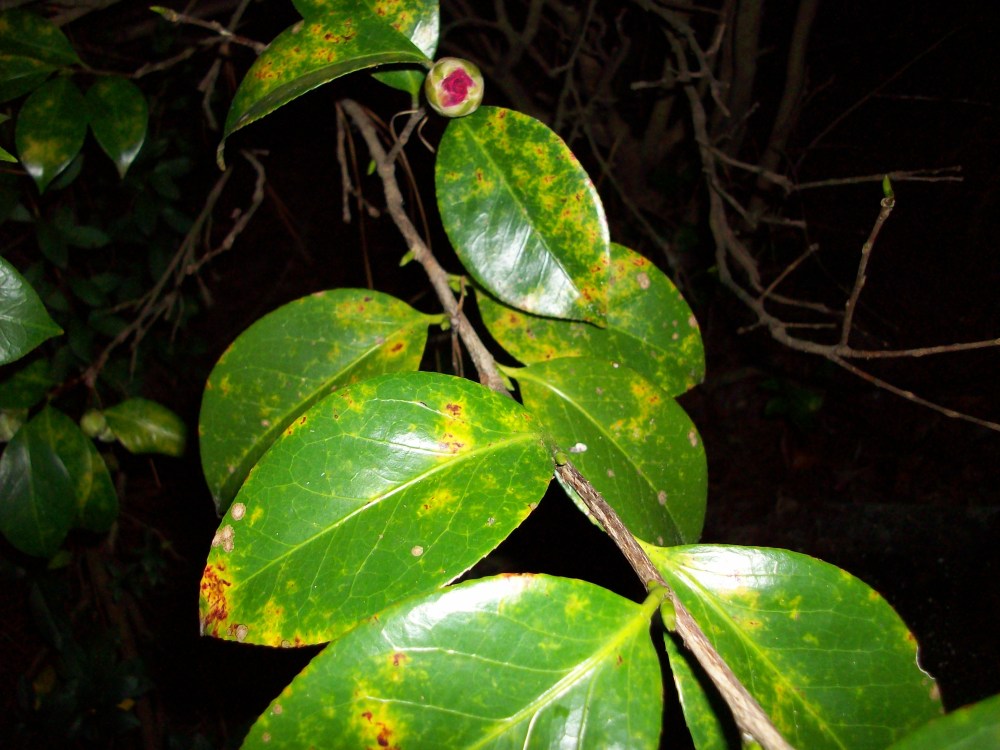
The next common insect issue is Spider mites. The leaf surface will have a silverish casting color to it. You can root this wood, if you want, but you must take into consideration you are propagating and spreading those problems as well. I still don’t recommend it. The leaves are typically stressed and have a harder time of actually rooting because of it.
The next issue to look out for is disease. There are numerous diseases that affect Camellia. Again, if it looks unhealthy and has issues, avoid it. Propagating wood that is diseased hard if not impossible. If there are funny spots on the leaves, it looks like the top is dying out, or a random branch is dead, it probably is diseased.
Other factors you want to think about and consider is that it has not been a very dry period before you take the cutting wood. If so, then water the plant the day before so that it is hydrated. The best time to take cuttings is in the morning. Do not take cuttings unless the temperature is over 55 degrees, you can but the success of rooting diminishes. If the weather is dry, bring paper towels that have been moistened. wrap the cutting wood in the paper towels.
So when you find a good healthy plant, you are going to want to inspect the stems. Ideally you want to harvest wood that was produced from last year’s growth. Those stems typically are of a reddish brown color. Now you can take stems that are more of a tannish gray color, which is older growth, but they don’t root as easy. Regardless, when you find which ever good cutting wood, you want to go back about 8 inches and make a prune cut there or slightly above the next node below it. A node it where the leaf meets the stem and vegetative bud pokes out of the stem. You can see in the picture above what I am talking about. What will happen is next year that bud will expand and form a new branch of growth. It does not matter if the wood you collect had flowers or not. The picture below gives you an example of doing this.
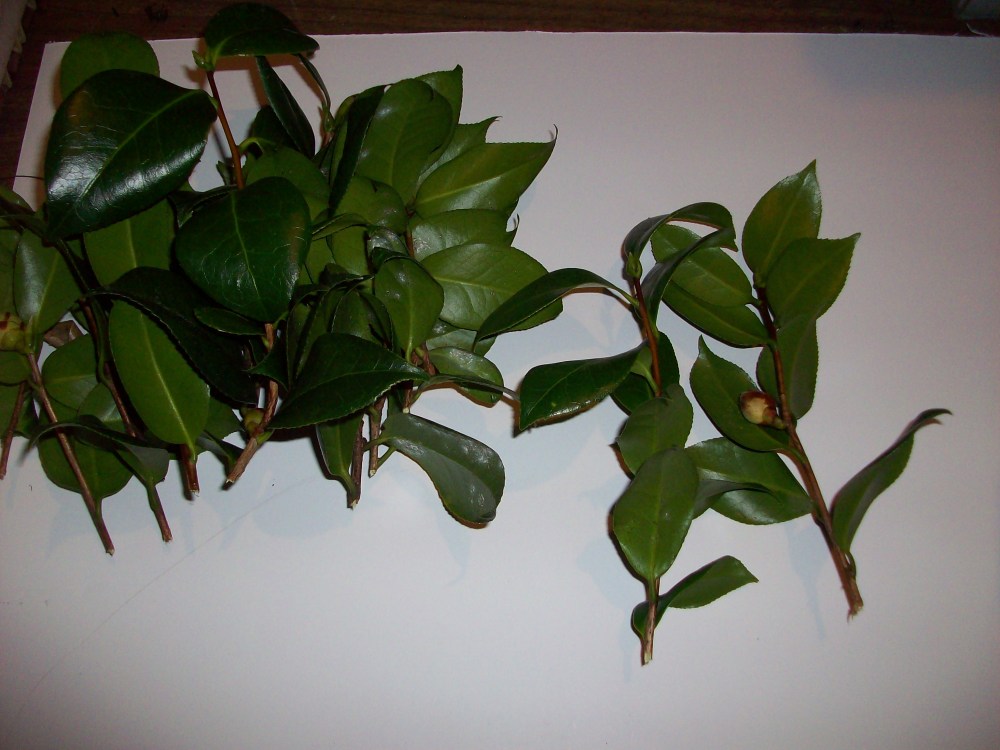
Depending on how many cutting you want to take and plants to root, will dictate how much cutting wood you will need. For this blog example, I would say approximately two handfuls. You should be able to make 15 to 20 cuttings out of that. Remember, all you need is a few plants to root and you can produce more in the future from your new plants, so don’t take too much and especially don’t take a bunch from one area.
Once you have gather your cutting wood, you will need to set-up your rooting hormone, process the cutting wood into actual cuttings and stick your cuttings. You want to do this as quick as possible. So gather the wood early, go to where you need to go to process the wood and make your hormone.
For Camellias, I have found a mix of hormone that works throughout the year. You can go to a local garden center and buy a “Dip N Gro” kit of liquid hormone and also pick up some rooting powder as well.
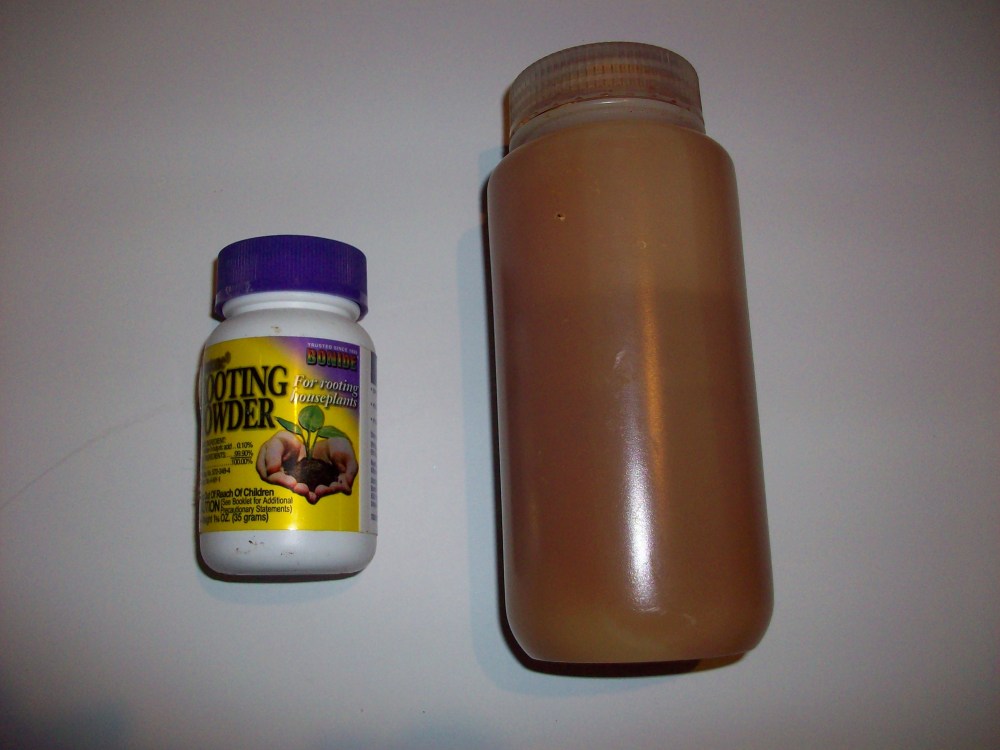
PLEASE WEAR LATEX OR NITRILE GLOVES WHILE HANDLING. You are going to need to mix the “Dip N Gro” kit to 2500 ppm IBA. The rooting powder should be 0.10% Indole-Butyric-Acid (IBA), which equals 1000 ppm. Once you have prepped your hormones, move onto processing the cutting wood.
Below is a picture showing how one can make cuttings out of cutting wood. I will explain in detail what to do.
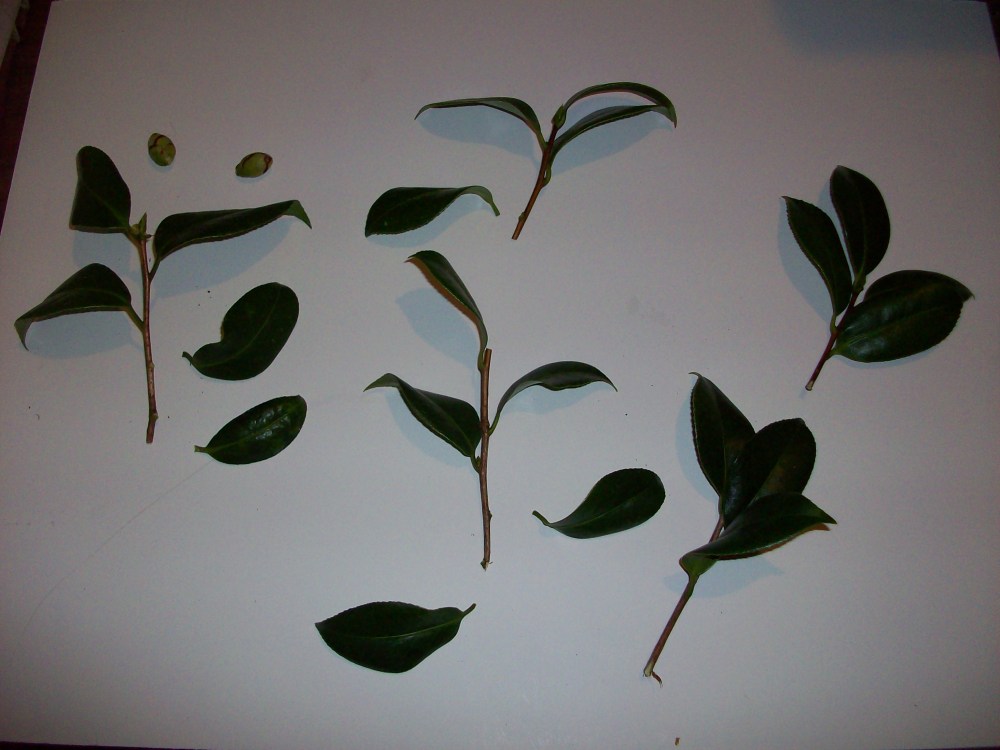
So as you can see we have several cuttings made. I like to have at least three leaves pre cutting when doing camellias. I have disbud the flowers from the cutting as well. Most of our 8 inch cutting wood has made two four inch cuttings. Ideally, a cutting should consist of four to five nodes. The top three nodes keep their leaves while the lower nodes have their leaves stripped. At the base of the stem opposite of the lowest node we will make a small 1/8 of inch to a 1/4 inch wound.
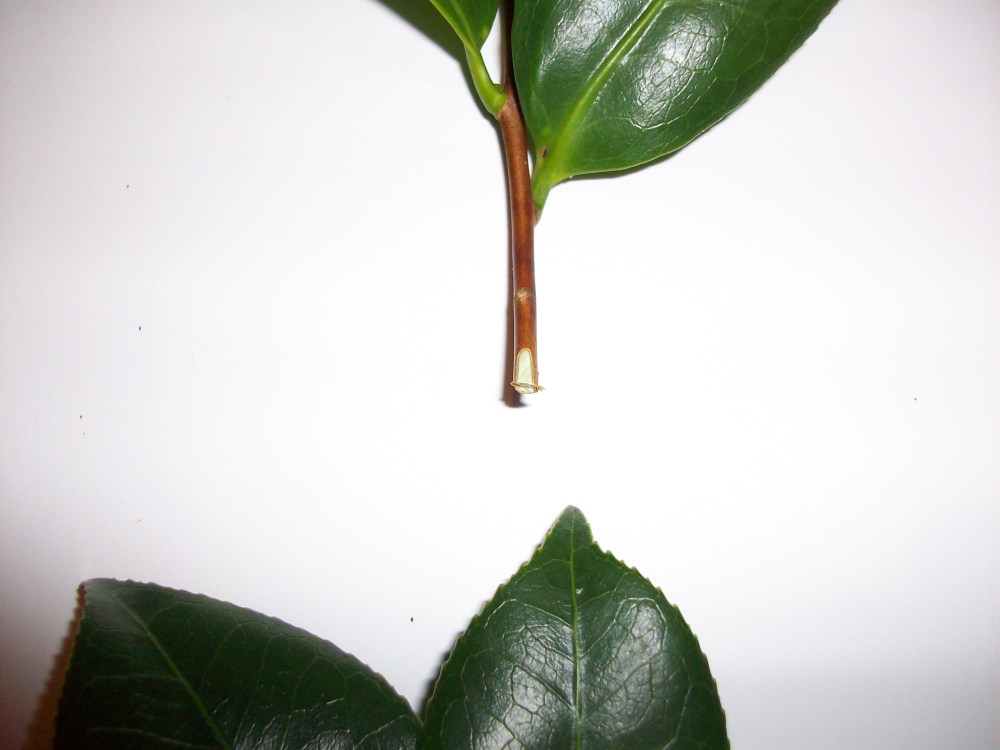
This wound will serve three purposes, the first purpose is allow a larger surface of liquid hormone to make contact and to be absorbed. The second purpose is the callus formation. That area will form a callus tissue from the wound. That callus tissue will be able to absorb water and nutrients before roots emerge. The third reason is to promote direct root formation above the wound from the stem.
Once you have prepped the cutting, it is time to apply hormone both liquid and powder. Again, please wear latex or nitrile gloves while handling the chemical and the cuttings after you have applied the hormone. Take 3 to 4 cuttings, bundle them together and then dip the stem into the liquid hormone for at least 15 seconds. Pull them out, tap off the excess, then dip the cuttings into the powder, pull them out and tap off the excess and stick into your containers in a triangle or square pattern.

While you are doing this, you are going to take your spray bottle and occasionally mist the cuttings. You will repeat this process until you have run out of cuttings or filled your containers.

After you have filled your containers, make some tags so you can remember what they are and when you stuck them. Insert one tag per container.
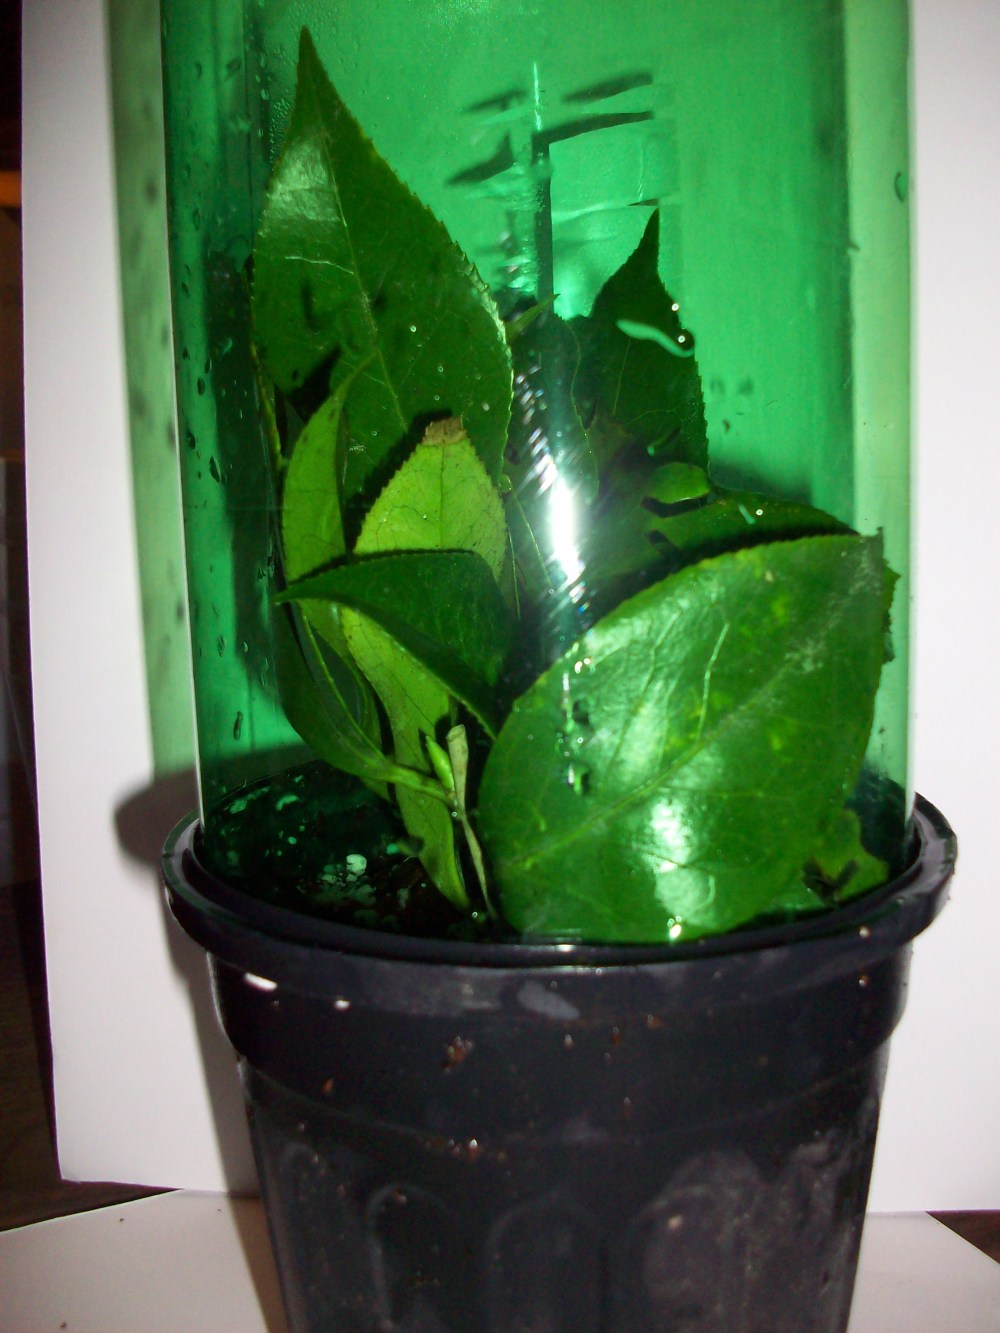
Once you have inserted the tags, go ahead and give the cuttings another misting before putting the lid on the container. It is important that when placing the lid on that you try to keep the leaves up and they don’t rest in the media.
Now it will take some time for the camellias to root. It will take about 12 to 14 weeks to have rooted plants that are ready to transfer to harden off and to pot up. After 4 weeks, you should be able to see some callus formation to occur. After 6 weeks it is possible to root formation to begin and after 8 weeks more formation. So here is some instructions and information to follow through the rest of the process.
#1 You will need to monitor the humidity within the lid. For the first three days, it s important to take off the cap and spray mist into the container. After three days, every other day will be fine for up to the sixth week. Yes you will need to check it daily.
#2 Once a week, take the lid off and clean out any leaves that have fallen off? If all the leaves fall out, it is not the end of the world. As long as the vegetative buds do not turn brown and fall off, you will be fine. Make sure you mist the cuttings before you put the lid back on.
#3 If the container feels light, use a water can to water the container. Anything that feels lighter than 40 to 50% of weight should be watered. It is important to allow the media to dry between watering, but to never dry out.
#4 In week 8, get some fertilizer that is high in the middle number, which is phosphorus and apply half strength as per the label. Usually this is called a high bloom fertilizer. If you cannot find it try a 20-20-20 fertilizer or whatever you may have as long as the middle number is a 10 or higher. You will repeat the fertilization every two weeks until week 14. Some garden centers or farm supply places sell a “rooting stimulator” formula, this will work too, but make sure it is not humate, humic acid, or a seaweed formulation (those products are for plants that already have roots and not in the process of forming roots).
#5 As the weeks go by and the season changes, you will need to monitor the outside temperatures. If the outside temperature is going to be above 75 degrees and it is before 12 weeks, remove the cap, if it is after 12 weeks take the lid off and place it in a shaded area.
#6 From week 12 to 16 is a transitional period, while you are still encouraging root growth, you might begin to see vegetative growth as well. If the night time temperatures are in the mid to upper 60’s with 70% humidity, you can take the lid off and place the plants in shade. Still check the plants once a day, preferable in the morning.
#7 Week 14 will be the last week you with fertilize with the high phosphorus fertilizer.
#8 Week 16 will be the week you transplant your rooted cuttings into a 1-gal container. Fill your one gallon container with a potting soil of your choice (preferable that it has fertilizer premixed) to halfway or slightly higher. Place the root cutting in the container and begin to fill up the pot. Fill the pot with media within one inch and a half of the top node or to the bottom of the lowest vegetative bud. Once you have filled the container, water in and settle the media. Add media and water again if needed. Place the plant in the shade for two weeks. After two week, slowly begin to move the plants out towards to full sun for sasanquas and sinensis and light shade for japonicas. Move them halfway the third week after planting and then little more the fourth week to finally full sun or light shade in the fifth week. One week after getting them to their growing spot, apply a granular fertilizer in the container all the way round but not near the base of the plant.
#9 Continue to monitor for watering and apply a liquid or water soluble fertilizer at least twice a month. I would recommend a balanced fertilizer such as a 14-14-14 or a high nitrogen like a 16-4-8. I personally use Jacks Classic Palm Fertilizer, because of the nitrogen sources, higher potassium, and complete minor elements package. Stop applying the liquid fertilizer by mid August.
We will write subsequent blogs following this one as we are going to be propagating quite a few camellias this year. If for some reason, you don’t have any luck, don’t worry, you will always have another chance in the future, just never give up. What is important is the patience and attention to detail. I developed this technique several years ago for Camellia sinensis (Tea camellia) and have had very good success with other type of plants too. So while someone would say I sharing my secrets, I am not, I am just sharing information that was once shared to me and giving the gift of a different point of view. I hope you have enjoyed this blog as I tried my hardest to keep it simple for the non gardener or horticulturists. While I did not got into the “air layering” method or “grafting” method, there will be other blogs that go into more detail about propagation and other related horticulture aspects in the future. Until next time, don’t forget to #Grow Forward and Have a Happy New Year, 2017 is going to be great!
Take Care,
Joshua
Picture of Camellia japonica Nuccio’s Gem

One Comment Add yours